How to Increase PNG Resolution Without Losing the Quality

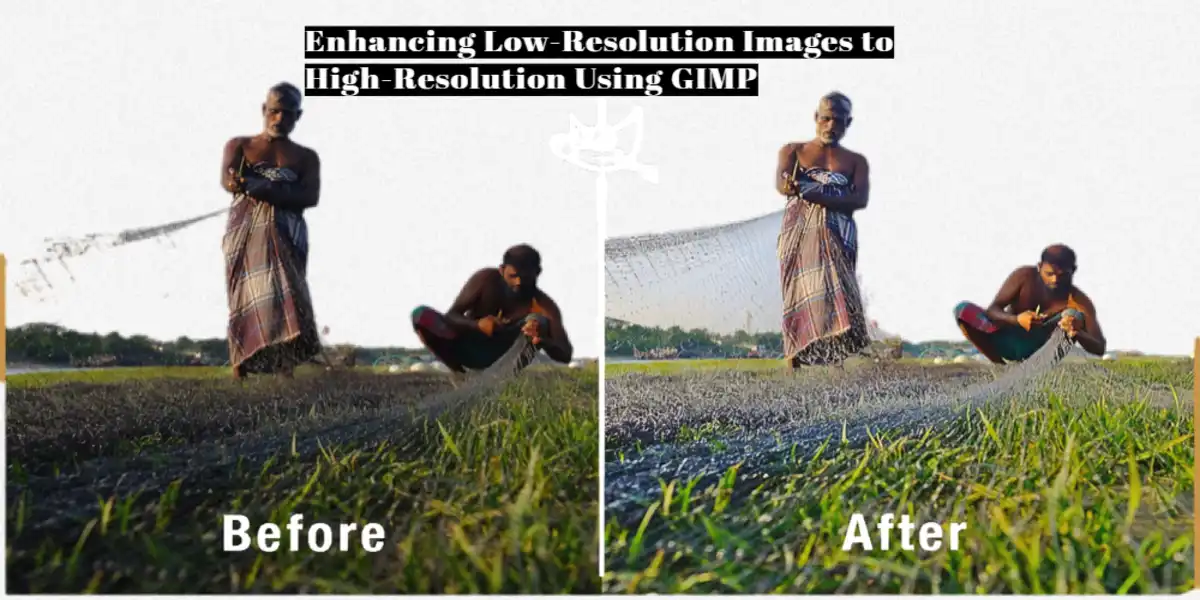
PNG ensures we show ourselves as a professional but their low quality, destroys our overall progress and we want to increase PNG resolution.

So, PNG also known as Portable Network Graphics is the most widely used image format after its release it took the place of gifs. PNG is a transplanted background image that can be used to show yourself as a professional.

In this article, we will show you how you can increase PNG resolution without losing their quality. We will go through auto to manual ways, which we discuss for every user (Windows, Mac, Mobile). 

What Is a PNG Quality Changer?

Before going towards this, I want to give you a short intro about quality changes and enlarger people’s confusion while selecting. So quality enhancer means you’re increasing the image resolution and enlarging means you are increasing the area of your image. Now I hope you aren’t confused next time. 

PNG resolution helps you to sharpen and clear your images. By doing so, you can increase the overall visibility of the image. 

PNG Quality Changer Examples

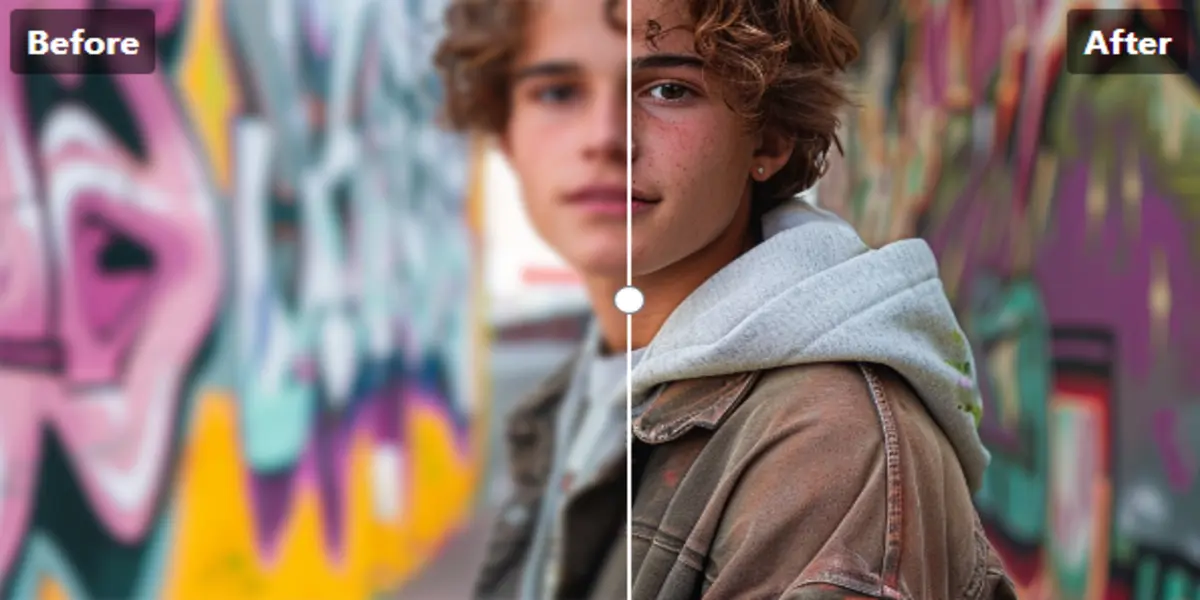
Imagine you have a PNG image of yourself and the image looks dull, and low resolution, your face is not clear in it, and your skin looks AI-generated, etc, if you change your image quality you can easily solve these problems.

By doing this you can transform your PNG image from low resolution to high resolution, make the blurry image clear, sharpen your image and skin, etc.

Benefits of enhancing PNG images

Here are some noticeable benefits:

  • Improved quality
  • Easy sharing
  • Free to read
  • Fewer Data Consuming

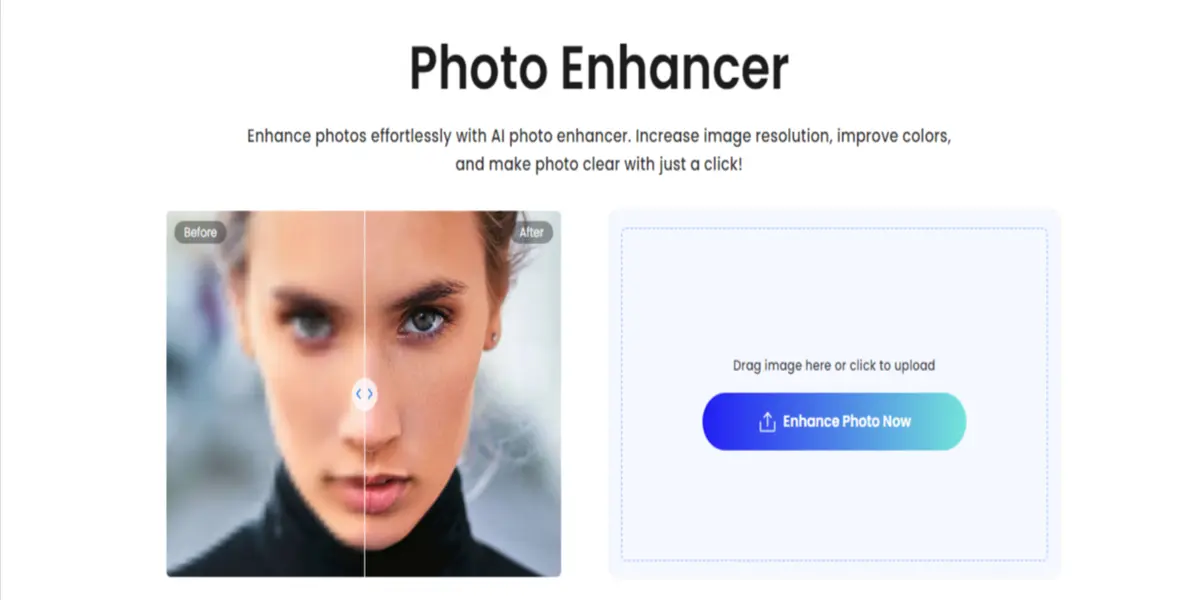
How to Enhance PNG Images with AI Photo Editor

As we know AI is the latest technology and in our photography industry is necessary. Here we will just discuss one most useful AI enhancement tools which will be all-in-one:
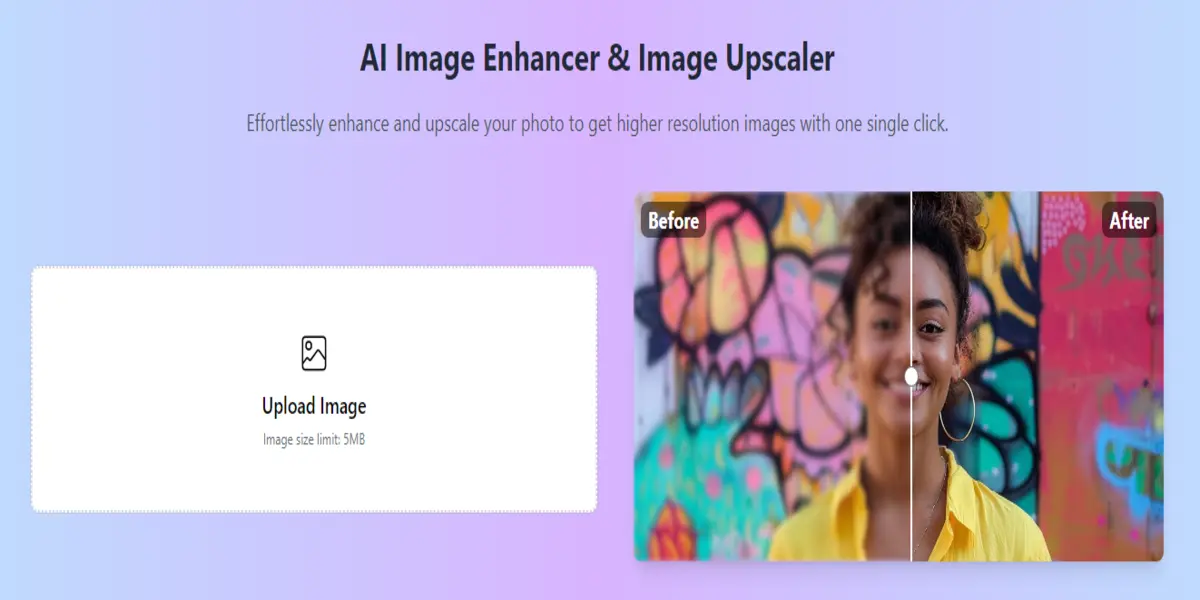
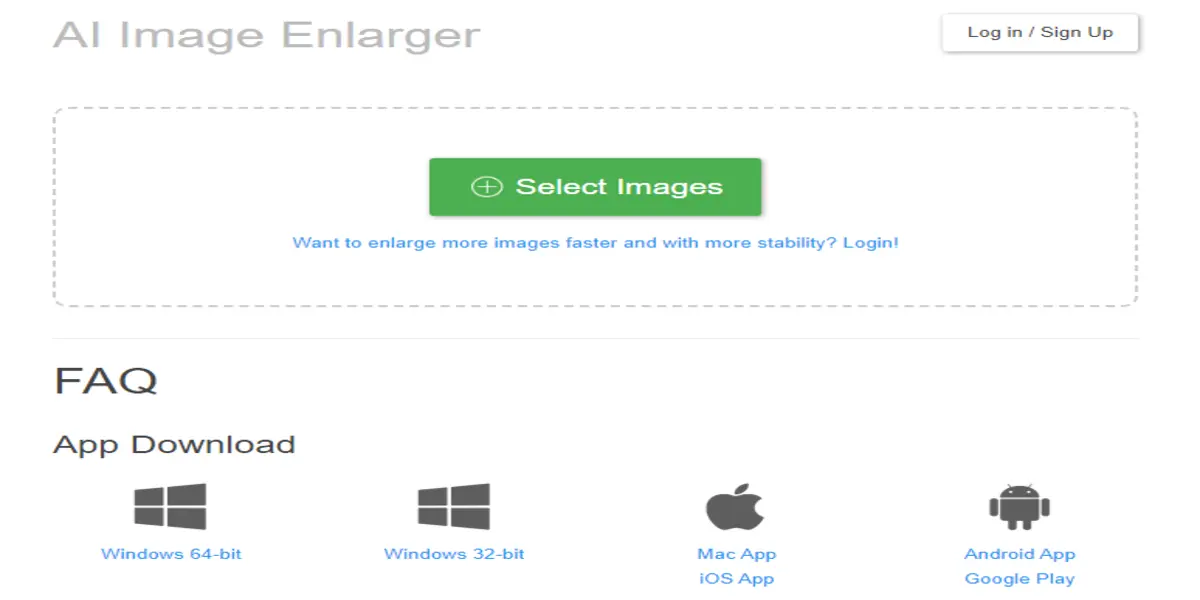
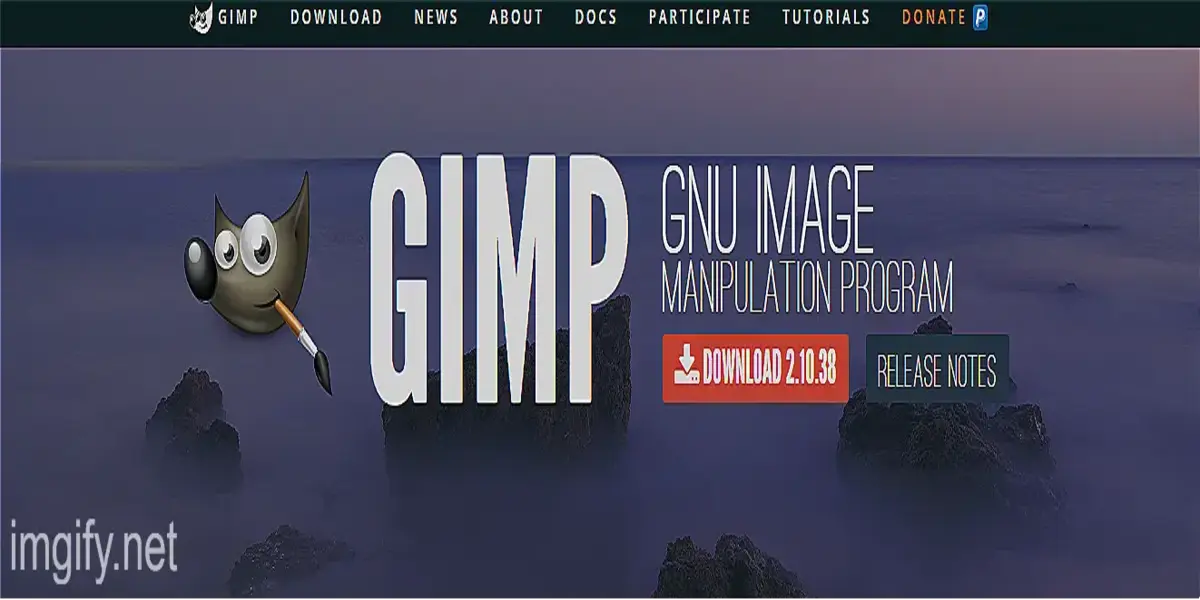
Imgify.Net

Imgify is an AI online image-enhancing tool. With the easy-to-use interface, you can easily enhance your PNG files. It uses AI technology to sharpen and clear your images. It includes 3 easy to do steps to enhance image quality: 

  1. Upload image
  2. Start Process
  3. Preview and Download

And you’re done here. Isn’t easy?

How to Increase PNG Resolution on Windows/Mac

If you are a Windows or Mac user you can use Photoshop to edit and upscale your images.

Adobe Photoshop

Adobe Photoshop is the most widely used software to enhance image resolution. Here are some key steps to increase PNG resolution in Photoshop:

  1. Upload Image: The very first step is to upload the PNG image, you want to upscale.
  2. Duplicate Layer: Duplication of your original image can be a safeguard of the original image. This helps in working on the duplicated layer without losing the source resolution.
  3. Size Adjustments: Go to image size and adjust it. Increasing size too much can lead to distortion so the simple way to maintain the image quality is to adjust it 10% to 20%.
  4. Enhance Image: Use upscale or canvas tools to enhance image resolution. 72DPI for mobile and 300DPI for print image.
  5. Sharpen the Image: Use the sharpen tool to recover the pixels damaged due to increasing resolution.
  6. Save Image: After completing these steps save the image to internal storage.

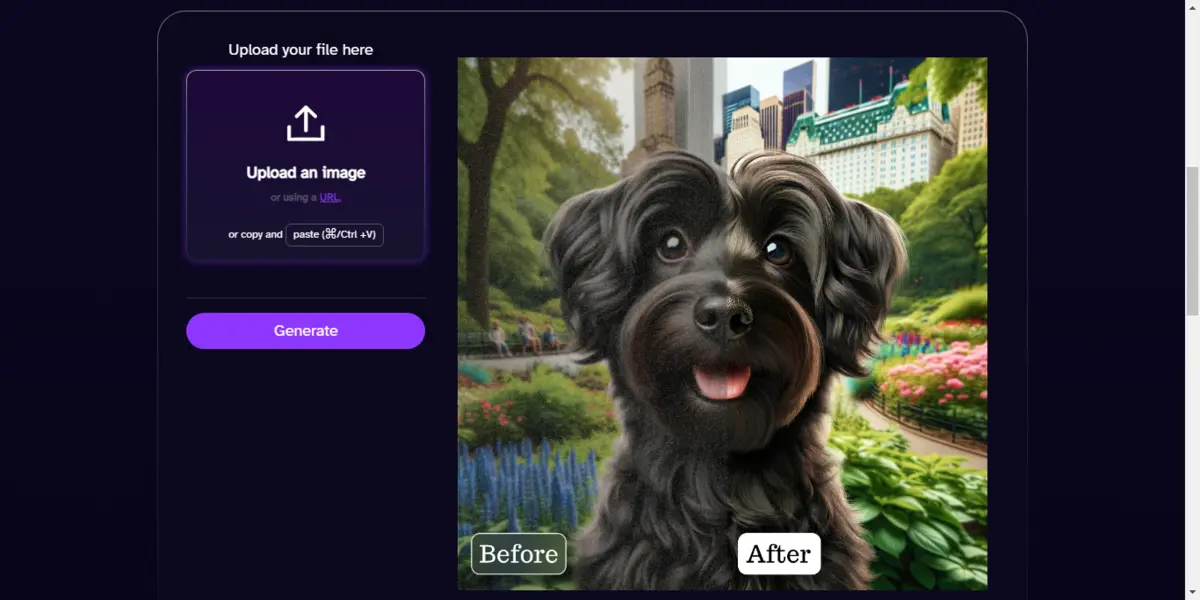
How to Increase PNG Resolution in Mobile

The Mobile Phone is the most used device in the audience. So for them, we came up with a guide for increasing their PNG resolution. Here we will just discuss a single but known app, by using it you can easily enhance your image resolution.  

Picsart

Picsart is a tool to increase image resolution.  You can access it on your mobile phone as an app or on the internet at their official website. The Picsart interface is easy to use and easy in the image resolution process. Here is the process from their website:

  1. Access the Picsart website.
  2. Navigate to the photo enhancer tool.
  3. Select the image by clicking on Browse an image
  4. Start Process
  5. Preview and download the image

Conclusion

In this article, we teach you how you can enhance your image resolution in easy steps. If you ask me to choose the best, I will choose Imgify as you can access it online so whether you are an Android or iOS user, Windows or Mac user you can access it for free. 

FAQs

How to make a PNG higher resolution?

You can use online tools such as Imgify to change a PNG to a higher resolution. 

How do I increase DPI in PNG?

If you use software such as Photoshop, in the image size you will access the DPI option for device photo 72DPI and for print media 300DPI. 

How to make PNG more clear?

You can make it more clear by sharpening it. 

How do I increase the size of a PNG?

If you increase the PNG resolution its size will be also increased.

How to Increase the resolution of images without losing quality

While enhancing, some issues may occur; the most unexpected is quality loss. It happens due to choosing the wrong tool for improving or the incorrect method. Don’t worry; we come up with easy steps to increase the image’s resolution without losing quality. 

In this article, we will go through an easy-to-do step of increasing resolution and then the best tools that can work best for this work. We hope you enjoy using them. Let us dive into more details!

How to increase the resolution of the image

There are three steps to increase the resolution of the image:

  1. Upload Your Image
  2. Start the Process
  3. Preview and Download image

These are super simple steps for increasing resolution. You can apply themImgify’sfy’s Photo enhancer. 

Why Use Imgify.net to Enhance Image Resolution?

Everyone asks this central question, so let me explain the answer. Imgify is an AI tool that uses the latest powerful AI technology to increase your image resolution without losing quality.

Moreover, it is more than a photo enhancer; you can restore your old images, clear your blurry pictures, and much more.

In contraImgify’sfy’s easy-to-use interface is good; it helps users do their tasks easily. Moreover, imgify.net offers other tools like background removal, face cut, sticker maker, cartoon pictures, etc. You can use all of these tools for free. 

Why is it Necessary to Improve the Resolution of an Image?

An enhanced and well-quilted image is important to represent yourself as a professional. The higher the resolution of your image, the higher its sharpness, details, and clarity. Whether you’re a businessman, marketer, designer, or website owner is necessary. 

High resolution is also helpful, as resizing your images affects quality. Here are some key points to understand its need:

  • Visual clarity: A high-quality image helps in marketing while running byproduct ads. Presenting this helps you with clear and enhanced charts, examples, and more.
  • Professionalism: Whatever field you belong to, high-resolution images are necessary. If you want to run ads, you need an eye-catching image. As a designer or social media marketer, you also need images that have lasting impressions on users, and high-quality photos are what you need.
  • Versatility: High resolution can be resized in different formats without losing quality.
  • Improved User Experience: you’re an SEO person and must know how important user experience ( UX ) is. It is a signal on which Google ranks your website, and high-resolution images help you improve it.
  • Better Print: High-resolution images ensure higher print quality for printing work such as posters, images, etc.

These are the benefits and reasons for having a high-quality image. 

Best Tools to Increase Resolution Without Losing Quality

Tools are the fastest way to enhance your image in easy steps. Here are our top picks:

  • Imgify
  • DeepAI Image Upscaler
  • Waifu2x
  • AI Image Enlarger
  • Big Jpg
  • Image Upscaler
  • Fotor
  • Adobe Photoshop
  • GIMP
  • pixel cut

Imgify.Net

Imgify image enhancer

Imgify is an AI tool that helps you enhance your images using the latest AI technology. It ensures that the image quality is maintained and enhanced. Its AI Photo Enhancer works best to restore old photographs, remove blurand improve image quality up to 4 K. 

Moreover, it includes a user-friendly interface to select the image and increase its quality easily. It is a free-of-cost AI tool, so you don’t have to pay to use this powerful AI. Let’s Enhance is an upscale tool that sures to increase your image resolution.

It also uses AI technology, allowing you to choose different resolutions to get your desired output. Its interface is user-friendly, and it supports multiple forms. Whether you’re a beginner or a professional, it fits both.

DeepAI Image Enhancer

How to Increase the resolution of images without losing quality

DeepAI is a photo enhancer tool that uses algorithms to improve the quality and clarity of your images. You can upload and select the resolution you want as an output.

Its interface makes it super easy for beginners and professionals. It can work on all images you want to upscale and supports different formats, too. 

Waifu2x

How to Increase the resolution of images without losing quality

Waifu2x doesn’t just increase image quality; it also includes noise reduction and image scaling algorithms to increase image resolution. If you’re an anime fan, improving the image quality of your favorite anime characters, such as Gojo or Naruto, can be best. Its easy-to-use interface lets you promptly enhance images’ quality in simple steps

AI Image Enlarger

How to Increase the resolution of images without losing quality

AI image enlarger is an online tool designed to increase image resolution. It uses AI technology to enhance images while ensuring sharpness and clarity. The tool is very straightforward: You have to upload a photo and, after enhancing it, download it. It supports various formats for using any of your JPEG files. 

Big Jpg

How to Increase the resolution of images without losing quality

Big Jpg is made to design your image effortlessly. Its AI technology and algorithms enhance your image resolution and clarity, which makes it stand out on social media. It includes a straightforward method for increasing your image resolution. It supports various formats, so you can easily upscale any image. 

Fotor

How to Increase the resolution of images without losing quality

Fotor is an online photo-enhancing tool that can highlight an image’s color and clarity, making it sharp. You can upscale an image in three steps: uploading, starting the process, and downloading. You can enhance any image resolution online; if it is blurry, the tool makes it clear without losing quality. 

Adobe Photoshop

Adobe image enhancer

Adobe Photoshop is a tool for professionals who want to increase their image resolution in various ways. You can enlarge the image, and Photoshop’s AI helps to ensure that quality is not lost. It supports multiple formats and tools for professionals. 

GIMP

Enhancing Low-Resolution Images to High-Resolution Using GIMP

GIMP is a free and easy-to-use online editing tool. You can download the software version or use the online version. Both are free and have the same features. It can be used as an alternative to Photoshop. It supports various formats for editing your JPG or RAW images. 

Pixelcut

How to Increase the resolution of images without losing quality

It is an AI tool that can enhance your image quality up to 4k. Its straightforward image upscaling method makes it easy to use. Its interface is simple and easy to use, so users can easily do their work. The most worthy feature of it is batch editing, which means you can enhance many images at once. 

Conclusion

In this articwe’vee’ve discussed how to increase your image resolution without losing quality and taught you how to do it super easily. Moreover, we recommend the best AI tools to enhance your image resolution, but the best is Imgif; you must use it. 

FAQs

How can we increase image resolution without losing quality?

Imgify to increase your image resolution, ensuring the quality will not be lost. 

How can you enlarge an image without losing quality online?

Use Imgify image enhancer to enlarge your image online and for free. 

How can I improve my photo to high resolution?

The easiest way is to use an AI image enhancer, and Imgify is best.

How to Edit Photo Without Using Photoshop

“Photoshop” is a word that becomes a verb in editing, isn’t it? It was released in 1990 when there was no competition, and they offered advanced features according to that time, but now the times have changed. It’s the time of AI and the latest software. 

On the other hand, Photoshop has a complex interface, which makes it difficult for a beginner to understand, and he has to watch some boring Photoshop tutorials to understand the basics. It is costly too; you have to pay something around $20/m to enjoy all features, which makes it an unusual choice for you. 

If I’m right, then you will be facing these things too, so we’ve come up with every possible way to edit your photo without Photoshop. In this article, we will review online tools, Free software, and simple ways to edit your images. This will be as easy as a pie! So don’t worry, let us dive into the details!

Best Ways to Edit Images Without Photoshop

There are three different ways for three different people. The quick list is following:

  1. Online Tools: Best For Beginners and middle 
  2. Free Software:  best for professional 
  3. Basic manual ways: Best for beginners

Online Tools: Best For Beginners and Middle

Online tools have become a most important part of our digital photo industry. There are thousands of tools available for every purpose such as Photo enhancement, background removal, etc. Our team has researched and we come up with the tools which are the best for every purpose.

Quick List Of Online Tools

Here’s a quick list of the top 7 free online tools to edit images without using Photoshop:

  1. Imgify
  2. GIMP
  3. Pixlr
  4. Picmonkey
  5. Canva
  6. Pixlr Bg
  7. Fotor

Imgify

Imgify is an AI tool that is accessible from any browser. It is a free-to-use online tool whose interface is easy to understand even for a fresher. You can see all the tools on the homepage including video editing tools. 

Features

There are the following tools/features they offer:

  • Photo Enhancer: To increase image quality.
  • Background remover: to remove background.
  • Cartoon makes: To make funny cartoon images
  • Blur remove: Best to make blurry images clear
  • Old image restoration: Restore your black-and-white images

And many other photo editing tools. 

How to Use Imgify

As it is an AI tool you don’t have to face anything just follow the three steps:

  1. Upload image
  2. Start Process
  3. Preview and download the image

And you are done here all the other processing will be done by AI. 

GIMP

It is a web-based free online editor with features similar to Photoshop, but its interface is quite easy, and if you want to edit images at the next level, you can watch interesting tutorials too, which will be provided by them. It has a software version, too. You can use it on your Windows and Mac OS.

Features

  • Layers 
  • Filters
  • Brushes
  • Masks 

And many more editing tools. 

Pixlr

It is a free editing tool which can also be accessed online. You can edit and download your images in easy steps. You can customize the image size and resolution/size you want.

There are two versions of it Pixlr X and Pixlr E. It has a pro version if you need to buy it. However, your basic needs will be fulfilled in the free version. 

Features

  • Online Editor
  • Less learning curve
  • All basic editing tools
  • Supports 30+ languages
  • Mobile App

PicMonkey

It fulfils everyone’s needs, from having fun to professional toon. All buttons are in plain English which is easier to understand than icons. It is available in English and Spanish. Includes a paid version, which costs $8/m, but it’s worth it. 

Features

  • Free trial
  • Free fonts
  • Templates
  • Other Fun things

Canva

It is a graphic design tool best for beginners as they get premade templates, they just have to adjust them. It could be best for people who want to post their images on social media. You get tons of free editable trendy templates in it.

Features

  • Premade templates
  • Basic editing tools
  • Free and paid are both available
  • Available online

Pixlr BG

Pixlr Bg is best for removing backgrounds from your images and making them professional in easy ways. Guess what, it is free and you don’t need to create an account to use it. You can use the same feature in Imgify too. 

Features

  • Background remove
  • Sign-in didn’t require
  • Free to use
  • Online available

Fotor

Fotor is an online AI editing tool. You can use it for free. Fotor uses advanced editing tools to enhance your images. 

Features

  • Collage Photo
  • Card maker
  • Poster maker
  • Beauty 
  • Retouching

Free Software to edit images without Photoshop

If you’re a Windows or Mac OS user and want to edit images in software but don’t have the requirements for Photoshop, you can use this software to edit your images and take them to the next level. 

Quick List

  1. Photo Director
  2. Paint.Net 
  3. Inkscape

Photo Director

It is an advanced AI editing tool. Best for colour changing. You can enhance your image colour by filter, contrast, and many more options. 

Features

  • Cartoon Photo
  • Filters
  • Background remove
  • Unwanted object remover

Paint.Net

Easy and user-friendly software. You can use it to do all the basic editing. It supports plug-ins, too, which helps you to add more functionality to your software. It is lightweight software so you can do it easily. 

Features

  • Plug-in supported
  • Best for basic editing

Inkscape

Best for logo designers, as it works best for editing vectors. You can create advanced graphics and illumination using it.,

Features

  • Vector design
  • Best for graphics design

Basic manual ways: Best for beginners

Basic ways are for those who don’t want to face complex things. By following them you can edit all basic things of your images. Let’s go to the steps:

Composition

By using composition, you can focus on a specific element of your pictures and catch the user’s attention. You can do this thing in two ways:

  1. Cropping: if you have a landscape image or a picture on a hill or something like it where you want to focus on you, you can crop the image. It can be a custom ratio or pre-selected ratios such as 1:1, 16:9, etc. By doing this, you can focus on yourself and share the image anywhere beautifully.
  2. Horizon: if the photo is selected, you can rotate it a little and then use the horizon to straighten the image.

Color Balance

Colours are the spirit of a photo, and if they are dull or less visible, you have to enhance them. It can be possible in two ways:

  1. Colour Correction: This is used to adjust the colour in your image. You can use HSL (Hue Saturation and Luminance) and RGB. 
  2. Color Grading: Color correction can fix mistakes in your images and color grading can enrich your image colors. 

Edit the Background

The background is another noticeable thing in your image which is sometimes ruined by unwanted objects or backgrounds. You can remove the background or try the following ways:

  1. Remove Unwanted Object: You can use any online tool, such as Photoworks, to remove unwanted things from your image and make it clear from any person or building.
  2. Add a new background: First, remove your image background and add a new background.

Sharp You Photo

Sharpening your image is the best way to make it less blurry and make the quality appealing. You can sharpen the blurry parts or overall image; it’s up to you. 

Touch Up

If your skin looks good you can smooth it by using Imgify or any other editor you want. By retouching your skin you can make your image quality super enhanced and appear on social media. 

Conclusion

In this article, we teach you how you can edit your image without using Photoshop. If you’re a mobile user, you can find the best photo editing app here. By applying these things, you can edit any image better than with Photoshop. 

FAQs

Is there an alternative to Photoshop?

Yes, in online tools, you can use Imgify, and in software, you can use GIMP or Fotor.

How do you edit photos to look better?

You can sharpen it, remove blur from it, and crop it if needed for a better look at your image. 

Can I achieve professional results with these free tools?

Yes, or maybe better results than Photoshop. 

Can I follow step-by-step instructions for these techniques?

Yes, you can follow these instructions and if you want an on-the-go solution, try using Imgify.

Online E-Commerce Product’s image Editor 2024: Software and Services

If you’re an e-commerce website owner, you know well how your images are important, right? As in e-commerce, your customers don’t check the features or anything else; the first thing that they see is your product image.

“First impression is the last impression” is an old saying that fits with e-commerce. Think, who will read the words if he’s getting a beautifully edited product image? 

In this article, we will teach you how you can edit your images online by editing AI tools such as Imgify editing product images by yourself; and if someone can afford those, there will be paid service provider companies too, such as Fiver, etc. 

Use Cases

There are some common places where you must edit product images:

  • Online Retail Store
  • Social Media Marketing
  • Digital Catalogue and Printing
  • Creative Professionals
  • AI-Generated Art
  • Email Marketing and Web Content

How do I edit photos for my online store?

Editing images for your store may take a little time but if you focus and practice, I’m sure you will be able to edit images easily. For ease of use, we come up with 3 solutions that you can use to edit your images, and these ways are the following:

  1. Online Photo Enhancing/Editing Tools
  2. Manually editing by yourself
  3. Companies to buy these services

Online Photo Editing tools

Those who don’t want to make efforts alone can use these AI tools. These AI tools do their work using AI technology. Here are some of the best online editing tools:

  • Imgify 
  • Pixlr
  • Photoshop
  • Pixc
  • Pixelmator Pro
  • Snapseed
  • Fotor
  • GIMP

Imgify

The Imgify AI Photo Editor

Imgify is an online AI tool that can edit your product images easily. Their AI technology is too good. You have to follow some steps, and you’re done. It auto-adjusts your product light, background, and more things needed for an e-commerce product. 

Features of Imgify

Here are some quick features of imgify:

  • E-commerce product editor
  • Background remover
  • Auto light adjuster
  • 4k image quality

How to Edit Your Images via Imgify

There are three super simple steps to edit your image and are following:

  1. Upload your product’s image
  2. Start the process
  3. Preview and download the product image

Pixlr

PIXLR

Pixlr is the most used online editing tool which is used by most of the people. It’s a powerful editing tool but has fewer functions than Imgify. However, it owns an easy-to-use interface with a couple of useful editing features, which are the following:

  • Premade Templates
  • Free 
  • Advanced photo editing tool
  • Batch editor

Photoshop

Adobe Photoshop

Photoshop is the most widely used software, and 10 out of 7 people use it. It also comes with an easy interface and hassle-free image processing. You have many editing and effects options to choose from. But you can’t do batch editing in it, and to enjoy all the features, you have to pay a monthly fee of about $20.

Pixc

Pixc

Pixc is one of the best e-commerce product editing tools. The reason is its outstanding background removal performance, but sometimes it makes some mistakes. On the other hand, imgify uses AI technology, which can’t make any mistakes. 

PixelMate Pro

PixelMate Pro

It is an on-the-go tool. You can do many tasks, such as enlarging, resizing, arranging layers, and more. It offers you many filters to edit your image quickly. It also supports Raw format editing. 

Snapseed

Snapseed

The most loved mobile editing app for Android and iOS users. It offers all professional editing tools, such as brushes, to smooth your skin. It is free and has an easy-to-navigate interface. You can customize tool settings such as their hardness.

Fotor

Fotor

Fotor is a web-based photo editing software known for it verstaility. They offer templates for e-commerce products and give a preview of how their image will look on social media ( Facebook and Instagram etc. These things give marketers an exact idea of what their product images will look like

GIMP

GIMP

GIMP remembers my old days when I was a fresher and didn’t have money, I was in search of such free photo editing software which will provide all editing software.

So, it is free web-based photo editing software that is free of cost. It offers templates and design options similar to Photoshop. It has a user-friendly interface. GIMB offers us paid tools for free which is a sign that editing doesn’t need money. 

If you still don’t like any of these tools, you can try out one of them too:

  • Photoscape X
  • Colorcinch
  • Instasize Photo Editor and Video
  • BeFunky
  • Canva
  • Polarr
  • PiZap
  1. Manually editing by yourself

To edit product images by yourself, try considering the following things:

  • Background
  • Shadow
  • Colour Correction
  • Cropping
  • Image variations

Background

Our main focus is to show the project, not the background, so if you set an irrelevant background, then it will hurt your customer. So Transparent background is essential as it will just focus on your object.

It is not a hard and fast rule, but I have assumed that some people generate great leads with a charming and relevant background matching the product and customer interest.

Example: You have seen cold drinks ads where products aren’t transparent but have relevant backgrounds, such as ice.

So, the relevant background is a must, and if you can not, try using Transparent. 

Shadow

Adding a shadow to the image shows a deftness that looks creative. It can be shown from different angles, adding a visual interest in the image. 

Colour Correction

Yes, the correct colors are a must in a project as they do not look good to a human, so it is necessary. You have to color it as it looks in real life. This helps your customers to understand what they are getting. 

Cropping

Removing the extra unnecessary part from your image is called cropping. Make sure there isn’t extra length which makes your image look bad. So crop that part for a good product look. 

Image Variations

Is the best way to hook the customer. It helps you and your customers. You can edit your product’s images from different angles, so it looks like a great choice overall. This thing impresses your users too; like when they can see the product from every side, they will be sure to make a purchase. 

Companies to buy these services

If you are a busy person and have a budget to buy paid services, then you can visit the following freelance platforms where people are offering their skills. Here is the list:

  • Fiver
  • Upwork
  • Pixelz
  • Clipping Path India
  • Guro

Visit these platforms here, and you will find many freelancers who are offering these things at an affordable price. 

FAQs

How do I optimize my images for e-commerce?

To optimize your e-commerce images, you can try imgify. It allows you to optimize your images using AI technology.

Why is eCommerce product photo editing important?

It is important because, in e-commerce, people see your product image, not your words, which is very important. 

What is the best online photo editor?

Imgify is the best online photo editor for your images.


You have to wait 70 seconds.

Generating Code…


Why are High-Quality Images Are Important to Your Business

“One Image is more than a thousand words” is an old saying affecting a business. According to Jeff Bullas (a social media marketing expert), 63% of people look at your product rather than other things. It doesn’t mean these aren’t important. They are too, but when it comes to sales, high-quality images become necessary. 

So, if you are tired of using pixelated and blurry images for your business and wish to use high-quality images that help you to generate leads for your business.

In this article, we will go through how you can enhance your images for your business. Our team researched and used these tools, and we recommend, that these tools help you. 

What is a High-Quality Image and Why Important For Your Business?

An image that is sharp, clear, and quilted is a high-quality image. High-quality images are more in size because of their greater resolution of pixels. In a high-quality image, you can see any object clearly in any size or zoom. It’s important for your business due to the following reasons:

  • Professionalism: A high-quality image represents your brand well. It enhances your overall appearance.
  • Customer Engagement: A high-quality image captures the user’s attention quickly and helps you to grow your brand and sales.
  • Marketing and Advertising: High-quality images capture attention easily so they help you to grow your business and helps you to generate maximum leads through ads.
  • Improved User Experience: Highly enhanced images improve your website experience, which has a major impact on SEO ranking. It reduces bounce rates and increases dwell time.
  • Brand Differentiation: High-quality images help you to give a different identity to your business.
  • SEO Benefits: As we know how, ranking is a must for organic leads, so as much your user experience and images will be good as much as they help you to rank on top at SERP.
  • Create a Massage: You will be shocked to know people judge your website in the first 2 milliseconds so if your images are blurred, no one will stay there, they move forward to another website.

The role of images in SEO

Images just don’t help you to become a different brand; they also help to increase search engine visibility, which lets the user land your website first and purchase the things they need. Here are some roles of images in SEO:

Image search rankings

High-quality images help to improve image search visibility, like when a person captures a product image and searches for it, and if your images are relevant and clear, google will recommend you in the results, which helps to increase traffic and leads. 

Page load speed

As high-quality images are more in size, it may take some time to load, which is a negative sign in Google to prevent this. You have to use webp image format it helps to load fast. 

User Engagement

In research, if you use images after a paragraph, this helps the user to understand the content easily and makes it to the user, he satisfies to Google. If Google is satisfied, it gives you a top-ranking position. 

Alt text and image titles

Alt or alternative text is essential for an image it helps the search engine or crawler to understand your image’s purpose. However, a good title helps you too. But make sure you know about the Panda algorithm as if it detects keyword stuffing, your website will be penalized. 

Structured data and image sitemaps

Google likes well-structured data and gives ranking to the websites that are following it. Moreover, if you enable images in the sitemap, it helps the crawler to understand where your images are hosted. 

Mobile responsiveness

As most people use mobile phones to access the internet, making images mobile-friendly is crucial. So, if you want to rank, you have to optimise your images for mobile devices. 

Top 10 Tools for Creating High-Resolution Images

If your images are blurred and you want to enhance their quality for your business, in the past days it was difficult, but with AI it is possible, and here are some of those best top 10 tools:

Imgify

The best image-enhancing tool is an all-in-one tool. You can access it online, and it is free to use. It offers an easy-to-navigate interface which makes it easy for you to enhance your images. You can enhance your images in three simple steps:

  1. Select image
  2. Start the process
  3. Preview and download the image

Features

And many more features.

Adobe Photoshop

Adobe Photoshop Express is the best overall editor. You can edit your images and enhance them by sharpening them and much more.

While the new full version of Photoshop might not run on every device, its smaller, smart version offers similar features. This version, Adobe Photoshop Express, is available on the Google Play Store.

Features:

  • Sharpening Tools:
  • Quick Fixes
  • Filters and Effects

GIMP

GIMP is the best free editing app and an open-source program. It has both a web version and a software version, and the web version works smoothly on most operating systems.

GIMP includes both basic and advanced tools, such as blending and anti-aliasing. While its interface may be challenging for beginners, it is easy to use for professionals.

Features:

  • Basic Editing Tools
  • Advanced Tools
  • Customization
  • Colour correction

Topaz Gigapixel AI

It is an AI-leading tool that helps you to enhance your images with AI technology. This is best for enhancing images, sharpening images, and de-blurring. But to use it, you have to install software, and on the other hand, Imgify offers you these things online.

Features:

  • AI algorithm to enhance images
  • 6x enlarge 
  • Advance details adder

Let’s Enhance

It makes it easy for people to enhance their images. It uses AI technology to enhance your images. It can enhance your images up to 4x. It is a user-friendly and easy-to-use AI tool. Its AI algorithms adjust colours in your image and make it high quality. 

Features:

  • AI algorithms
  • 4x enlargement
  • Auto color correction

Fotor

Fotor is great for photo editing because it has many tools. You can do simple fixes or more advanced edits. It can help make old photos look new, reduce noise, and retouch images to make them clearer.

Features

  • Basic Editing Tools
  • Noise Reduction
  • Image Retouching
  • Creative Effects

Pixelmator

It is a robust editing tool that is best for image enhancement. It includes advanced features. It supports different formats (JPG, RAW ), so you can upload any type of image. Its interface is easy to understand, and you can apply adjustments easily.

Features

  • Advance algorithm
  • Supports many formats
  • Colour correction

Luminar Neo

It offers an innovative way to enhance your images. It offers many AI tools to enhance your image easily. Its easy-to-use interface helps the user to understand every tool so they can edit their images easily.

Features:

  • AI tools
  • Portrait retouching
  • Easy-to-use interface
  • Filters and effects
  • Various file formats

AI Image Enlarger/ Vance AI 

It is the best tool, designed to produce high quality. Its AI tools can enhance your images 4x more than the original ones. Its user-friendly interface makes it easy for users to understand what they have to do to enhance their images.

Features

  • AI tools
  • Easy Interface
  • Various Formats
  • 4x quality

PhotoZoom Pro

PhotoZoom Pro is known for its high-quality image generation. It also uses algorithms to enhance and enlarge your images. It also supports various image formats. It uses s-spline technology that enhances your image without distortion. 

Features

  • High-quality images
  • Different formats supported
  • AI Tools

Tips For Maintaining Your Image Resolution

You can take the following points in mind to maintain your image quality for a long time:

  • Use High Resolution
  • Do Proper Compression
  • Use Optimized Light
  • Choose the Right file format
  • Maintain Aspect Ratio
  • Do Proper focus
  • Limit editing

By applying these things to your images, you can easily maintain their resolution.

Conclusion

In this article, we told you about the importance of images for your business as well as some important tools to enhance your images and some tips to maintain their resolution. The best tool that I’ve recommended is Imgify, an AI tool that lets you enhance your images easily with AI-powered technology. 

FAQs

Why High-quality images are important to your business?

High-quality images are very important for your images as they are worth more than a thousand words. It helps you to rank on Google and generate organic leads.

Why do we need high-quality images in marketing?

While marketing, we need something that catches the user’s attention and there’s the need for high-quality images that capture the user’s attention too fast and easily.

Which format can be enhanced easily?

JPG or PNG formats can be enhanced easily.

How to Enhance Photos Quality in Adobe Photoshop: Guide 2024

How do you enhance a pixelated photo in Photoshop? It is a common question asked by everyone and in this guide, you will be going through this process where you will learn how to enhance photo quality in Photoshop. 

What is Image Resolution?

Image resolution means how much quality a tool holds, measured by pixels, and the number of pixels on a screen, called image or video resolution. The higher the number of resolution pixels, the higher the image quality. 

A normal image is approxe 72 Dpi (dot per inch) which varies for some image formats JPG (JPEG) is 72 for the web and 300 dpi for print as far PNG, Webp, GIF, BMP, SVG, and HEIF. The high resolution of an image format truly matters. 

Here’s a question that arises, is it possible to increase image quality? So the answer is yes you can do it in multiple ways like by Photoshop, Photo enhancer Software, Online photo enhancers, and Imgify photo enhancer. 

How to Enhance Image quality with Photoshop

Key Steps to do that:

  • Import the Image
  • Color Balance
  • Brightness and Contrast
  • Sharpen the Image
  • Remove Noise
  • Save Image

Import The Image

First import an image you want to edit, to do so click on files then open it and select the image you wish to edit or you can drag and drop that image you want to edit. 

Color Balance

Every photographer uses to enhance their image color to enhance the image. Correcting color adds quality to your image and to create a dynamic color you can use Photoshop’s color balance tool. 

Steps to Apply Color Balance to Your Image

  • Adjust panel
  • Color Balance
  • In Color Balance1 choose any tone balance
  • After getting the best color, change the file name from color balance1 to anything else

Brightness and Contrast

Getting the right light while shooting is difficult for every photographer. Because of this, some photos may look dark and some look light. To adjust this problem we use Photoshop brightness or light settings. Increasing contrast in your image makes it a little hard and enhances colors and decreasing can be caused for black and white images

There is no hard and fast rule for brightness but make sure to adjust it according to your image light as increasing can cause more light in the image and decreasing make your image dark so you have to adjust it on your own. 

Steps to Adjust Brightness and Contrast

  • Menu bar < Image
  • Adjustments < Brightness and Contracts
  • Slide the Slider to increase and decrease light and contrast
  • Click OK and settings will be applied

Sharpen the Image

Little blur or lack of sharpness makes your overall image quality dull. The solution is to use the Photoshop Sharpening tool. This makes your image deblur and corrects overall lens distortion. Sharpness makes your image sharper too, it may be a bit hard to see the details normally

 Steps to Sharpen Your Image

  • Background Layer < Duplicate Layer
  • Blend Luminosity of the new layer to prevent form color misshaping
  • Filter > Sharpen > Un sharp Mask
  • Un sharp Mask
  • Move the Charge slider to decide the amount of sharpening, The Radius slider specifies the width of the sharpening effect at the borders of images. The Threshold slider shows how different the sharpened pixels must be from other covering pixels of the image.

Remove Noise

Noise can be caused by pixelated images. It can be due to color distortion or Luminosity distortion. Color noise appears when color is distorted and luminosity occurs when the grain is seen on your image

Steps to Remove Noise From Images

  • Filter > Noise > Reduce Noise
  • Next, move various sliders to modify the noise of the image. The Strength slider defines overall noise reduction, the Preserve Detail slider holds sharpness, and the Reduce Color Noise and Sharpen Details sliders further purify the noise reduction stages. 

After accomplishing all these things you will get a unique look of your image which is improved and beautiful. In this way, you can enhance blurry photos in Photoshop. 

Importance of Photo Enhancing

In this age, everyone wants their images in high quality form and if your images are dull and low quality it looks pixelated and blurry. To prevent this type of thing you can use Photoshop to enhance your image in easy steps and create an image that stands out over social media. 

The Dissimilarity Between Image Enlargement and Resolution Improving

Image Enlargement and resolution improvement both are separate things. It is a process of increasing image dimensions and overall physical size. On the other hand, resolution enhancement means increasing images visual. 

Online Tools For Image Enhancement

Here are the top 10 best online photo enhancer tools:

  1. Imgify
  2. Let’s Enhance
  3. Deep Image
  4. Waifu2x
  5. Bigjpg
  6. AI Image Enlarger
  7. VanceAI Image Enlarger
  8. PixBim Enlarge AI
  9. Fotor
  10. PhotoZoom Pro

By using these tools you can enhance your images in easy steps and all your other work will be done by AI. 

Tips for Increasing Image Resolution

Here are some simple and easy tips for increasing image resolution: 

  • Use Photoshop’s Super Resolution: Use the Adobe Photoshop super-resolution feature to enhance image resolution while enlarging. 
  • Apply Image Resampling: Choose the right method and make sure to maintain it while enlargement.
  • Adjust Image Size Gradually: Improve your image in snappy pieces rather than all at once.
  • Sharpen After Upscaling: After doing all settings, apply a little sharpening on your image to enhance it more.
  • Consider Vector Graphics: For logos use vector graphics rather than images.

By applying these tips you can enhance and maintain your image resolution effectively. 

FAQs

How to enhance an image in Photoshop?

Repeat after me:

  • Import the Image
  • Color Balance
  • Brightness and Contrast
  • Sharpen the Image
  • Remove Noise
  • Save Image

Does upscaling increase resolution?

Yes, Upscaling can increase your image resolution. 

How do I fix low quality in Photoshop?

By adjusting the size and up sample you can fix low quality in Photoshop. 

Can we convert a normal photo to HD?

For this purpose, you can use the Imgify photo enhancer tool. It enhances your image up to 4k.

How to Enhance Eyes in Photos Using AI Tools: Enhance Eyes Manually

Probably you’ve heard somewhere that eyes are the windows of our soul. As in peaky blinders, we see that eye contact matters too much and because of watching Netflix, work, etc, our eyes become dull and closed which doesn’t have a good impact on anyone.

So if your eyes don’t look pleasant even in pictures with a natural smile and you wish to correct them, Now you can enhance your eyes in photos with simple and easy steps. Let us dive into more details!

How to Enhance Eyes In Photos With Imgify

So if you want to enhance your images online without effort, you must try Imgify

Now you must be asking why I use Imgify over others. So the very first reason is it’s free and an online tool which is accessible via Chrome browser. 

It is an AI tool so your images will be enhanced directly with AI technology. With easy steps:

  1. Upload your image
  2. Start the Process
  3. Preview & download image

In this way, you can enhance your eyes easily and fastly. Moreover, Imgify is more than you think, it can enhance your images, remove dark spots, and make your eyes and image overall look better moreover it focuses on some important things while enhancing your eyes such as:

  • Fix Red Eye
  • Eye Brighten
  • Eye Color
  • Digital Eye Makeup

Tips to Enhance Your Eyes Colors

Here are tips to click a perfect image and make your eyes clear:

Let there be a light

To get a wow photo we need a perfect light angle which doesn’t just improve your eyes, it improves your overall image too. So I divide it into two parts. The first one is finding a good light and the second one is to sparkle them via Photoshop or any other easy-to-use editor. 

Open Shade

Open shade helps to focus all light on your eyes and lets you make clear pictures. Open shades such as under a tree or in the shade of a building. The best picture clicks when the source of light is from upfront with your object facing it. 

Window Light

Make sure that the person is in front of a window or an open doorway. Make sure the light falls on the object’s face and eyes.

Not facing a light or window is a good idea while taking images but you can also close that window or doorway at an angle of 45 degrees. Make sure to face angled a bit from the window or source of light. By doing this you can capture outstanding portraits.

Look Up

It doesn’t mean that you look up but your object does. By looking up, the sky reflects into your eyes. The easy way to click this type of image is to stand higher than the object so he will look up automatically and naturally. I love to create such images as in this way you can capture the sky in your eyes which looks advanced and beautiful. 

Practice Makes the Men Perfect

By practicing you come to know about yourself, and your skills and this improves observation. You come to know, by which angle the image looks better, you know where to put the object.

So when you start working every time you go to a new place these practices help you to find the better place to shoot and where to put the light etc. 

Conclusion

In this article, we have gone through how you can enhance your eyes using an online tool ( Imgify ). Moreover, we enlist some tips to take clear and more natural images that help to edit easily after clicking. By using these tips you will come to know how to click pictures. 

FAQs

How do I make my eyes look better in pictures?

You can use Imgify to make your eyes look better in pictures and make them stand out on social media. 

How do you make your eyes brighter in a picture?

If you want to do it manually then you can try the object facing the light and however you can sparkle your eyes with Photoshop and Imgify. 

What makes your eyes glow in pictures?

Their sharpness makes them glow in pictures.

Rimini Alternatives: Best Apps Like Rimini 2024

Are you still in search of a photo enhancer app just like Rimini? So your search ends there. We came up with a huge list of Rimini alternative apps that can help you enhance your image resolution, improve the text of your image, and many more things.

In recent years AI photo enhancer apps have become popular among the public because they use AI technology to enhance your images correctly. Rimini is one of the best apps for photo enhancing but if you didn’t like it you can use their alternatives.

Best Alternatives Of Rimini App

If you’re looking for alternatives to Rimini for photo restoration and enhancement, here are some excellent options, categorized by their strengths:

Photo Restoration and Colorization

Imgify: Best For Photo Enhancing

Imgify is an AI-powered tool that helps you enhance your images to the next level. Whether your photo is blurry or old it can enhance them by sharpening. Moreover, it is free to use and easy to access via your Chrome Browser. It can be the best photo enhancer like Rimini online. 

Features

  • Photo Enhancer up to 4k
  • Old image restoration
  • Anime Image enhancer
  • Make your blurry image clear
  • Free of cost
  • Restore old photos

Photo Enhancer Up to 4K

Our image enhancer makes your dull pictures clear and high quality. The image resolution enhanced by our AI is more than 4k. So if you want your images to be high quality you can use our AI tool. 

Old Image Restoration

If you have an old image and you wish to restore it like today’s images? Now you can restore your old images just in one click using Imgify. It uses AI to retouch and colorize your image. This process makes your image clear and colorized. 

Anime Image Enhancer

If you are an anime fan and want to enhance Naruto images in high quality, you can use imgify for this purpose. This tool helps you to enhance your low-quality anime images clearly, sharper, and higher quality. 

Make Your Blurry Images Clear

While taking the picture it got blurred and want to remove that blur? You can use imgify for this. This tool helps you in making your image de-blur. It sharpens your image using AI technology and your image will look better than ever before. 

Free Of Cost

Imgify is a free-to-use and easy-to-access tool. You can visit it and use it without paying anything to anyone. Moreover, it is the best tool I’ve ever used because it offers too many features you must have to visit it. 

PicMa: Best for Colorizing Black and White Photos

PicMa is best for retouching images, refining your portraits, and overall image quality. It is best for users who are seeking to retouch their images in an easy-to-use interface.

Vance AI: Best for AI-Driven Image Upscaling

Vance AI is another alternative that can enhance your images by 800% and enlarge anime pictures 16 times more. It is easy to use and is paid but also gives you trials to check how it enhances your images. 

Colorize: Best for AI-Powered Photo Colorization

Colorize app is best for your black-and-white photos. It uses AI to fill colors into your images. It can be best for your childhood or vintage images. It can also denoise and de-blur your images

FixMyPics: Best for Restoring Old Photos

It is the go-to app for those people who want to restore their old or black-and-white images. You can use it to restore your images in no time. It has powerful filters and tools to restore your old images.  In contrast, it is available on both Android and iOS

Topaz Labs: Best for AI-Powered Image Enhancement

Topaz Labs can work best on images having noise. Their AI removes the noise or grain and makes your image clear and enhanced. As a Rimini alternative, it can sharpen your images and remove blur from them.  But it is paid so to access all features you have to pay $199 for lifetime access.

Basic and Advanced Photo Editing Alternatives

Fotor: Best for Basic Photo Editing

Fotor can be the best choice for people who want to brighten their dark images in easy steps. It offers wide enhancement and light control options, even you can control your image exposure, contrast, shadow, white and black, etc. 

Lightroom: Best for Advanced Color Correction

Lightroom is known for its variety of image editing tools and features such as you can use presets to enhance images in seconds. As an alternative, it can enhance your image colors and make it sharp. You can export your images in JPEG format.

Pixelup: Best for AI Photo Enhancement

Pixelup can be the best option for those who are looking for an app that can enhance their image and doesn’t lose the quality of their original image. It owns advanced enhancing algorithms for image enhancement.  

Snapseed: Best for Professional Editing on Mobile

Snapseed is the best photo editing app for Android and iOS users. Whether you’re looking to enhance your image color, light, or smooth, you can do anything with it. Its brushes help you to make your picture smooth and with a mast filter, you can apply a whole image to your image, and by selecting your object the edited image will work as a background.

Luminar Neo: Best for AI-Driven Photo Editing

Luminar Neo can be best for people who want to enhance their images like Photoshop as it includes a layer system like Photoshop but its tech and interface are simple as compared to Adobe Photoshop. It can also edit RAW files at a fast speed and resolution. 

PhotoSuite 4: Best for Comprehensive Mobile Editing

PhotoSuite 4 can be best for editing your image’s light, exposure, contrast, and shadow.

An alternative it does best for enhancing your images with a wide range of tools and an easy-to-use interface. 

Creative and Social Media Editing Alternatives

Picsart: Best for Creative Edits and Filters

Picsart is also an on-the-go option for people who want to edit images in an easy-to-use interface. They include a large number of tools and filters. Moreover, with the in-app AI image enhancer, you can enhance your image too. If you don’t like to edit images you can search for your category images then Picsart applies the same setting of those images to your images

Canva: Best for Social Media Graphics

Canva can be best for pixelated images. It includes some other powerful tools too but as a Rimini alternative, its image stands out for its improved quality, clarity, and colors. 

VSCO: Best for Film-Inspired Filters

Vesco makes it an ideal choice for photographers due to its amazing filters and tools and as an alternative, it can do best for enhancing your images in their best quality. 

FaceApp: Best for AI Face Editing

FaceApp is the best tool for face enhancement. You can check your face shape in it and edit your face shape in it too to know which style suits you. As a Rimini alternative, it can enhance your face easily via AI technology. 

AI Enlarger: Best for Enlarging Photos Without Quality Loss

AI Enlarger has an online and mobile version. By using it you can enlarge your images in seconds without losing their quality. 

Lens: Best for AI-Based Lens Corrections

Lens uses AI technology to enhance your images without losing their quality. In this way, you can clear your blurry images. It can enhance your image up to 16 times. You can enhance your up to 4k quality. 

Specialized Image Enhancement Alternatives

ON1 NoNoise: Best for Reducing Noise in High ISO Images

It can remove noise from images and make them clear but as it is an alternative to Rimini it is more than a denoiser it can enhance your RAW files with its fast and enhanced performance. You have a Lightroom plugin too. 

LetsEnhance: Best for Enhancing Photo Resolution

LetsEnhance as the name shows can be used to enhance your images and improve their quality. It makes your images clear naturally ensuring the quality of images up to 4k with 300+ DPI.  You can use their API too. 

PicWish: Best for Enhancing Low-Resolution Images

Picwish helps repair images. It owns an easy-to-use interface and as it is a Rimini alternative it has powerful tools to repair your images. It is available on Android and iOS with ratings of 4.7 and 4.8

Background Removal and Image Compression Alternatives

SnapEdit: Best for Removing Backgrounds

Snapedit is best for people who are seeking a mobile app to remove their image blur. However, it has some other features too such as some filters, an amazing background, stickers, and much more. 

CUTOUT.PRO: Best for Cutting Out Subjects from Backgrounds

CUTOUT.PRO is an online web-based tool. You can use it to enhance your images which makes it a Rimini alternative but this is more than an enhancer you can remove your background and even remove unwanted objects like Imgify. 

Video Editing and Enhancement Alternatives

HitPaw: Best for Video Editing and Conversion

HtiPaw can be best for video and photo editing. It can enhance your images with just one click. If your image is blurry or noisy it can remove them and make your images clear and sharper. It can also enhance your images up to 4k.

Stock Images and Color Grading Alternatives

Color.io: Best for Color Grading

Color.io is a web-based editor with an easy-to-use interface. It can be best for color grading. you can enhance your images by signing in at their official web. It can import and edit RAW files. If you have more than one image you can use their batch editing features to enhance your all images at once. 

StockPhotos: Best for Accessing High-Quality Stock Images

 StockPhotos is the best alternative but it costs $0.1 for each image but also provides you with some test attempts to check how it works. However, we use it and it does well. It can upscale your images up to 8x but is paid. 

How to Choose the Right Rimini Alternative?

When choosing a Rimini alternative, consider what you primarily need:

  • Restoration and colourization: Tools like FixMyPics and PicMa excel at restoring old photos and adding color.
  • Basic or advanced editing: Lightroom and Luminar Neo offer advanced editing features, while Fotor is great for basic needs.
  • Creative editing: If you want to add filters, and stickers, or create social media graphics, Picsart and Canva are your go-to.
  • Video work: HitPaw provides excellent video editing and enhancement capabilities.

Conclusion

In this article, we have gone through many alternatives of Rimini where we described image restoration and enhancement alternatives. Think what if you have all these features in one tool? So we want to tell you that Imgify has all these tools from image enhancements to video editing.  You try it for free. 

FAQs

Can Remini enhance photo quality?

Yes, it enhances your image quality. 

What is the best AI photo enhancer for blurry photos?

Imgify is the best AI enhancer for blurry photos. 

Is there an app better than Remini?

Yes, you can use imgify or picMa.

What is the best app to increase photo clarity?

You can use Rimini but if you want to use their alternative then Lightroom can be the best one.

How to Enhance Images Using GoPro: Tips to Enhance Images

The HERO camera also known as the GoPro and was released in 2004. Since its release to now, many people have loved using this cool action camera.

It is great for taking pictures and videos in all kinds of places. You can take beautiful pictures while on a hill, diving underwater, or climbing a mountain. This camera helps you capture amazing moments.

But if you want to take great photos with a GoPro, you need to know how to use it in a better way. How can you make beautiful pictures with your GoPro?

In this guide, we will share easy tips to help you take awesome photos that show the fun of your adventures. Let’s dive in and learn how to make your GoPro photos shine!

How to Enhance GoPro Photos

Here is a quick list:

  1. Setting Up for Success
  2. Mastering the Wide-Angle Effect
  3. Avoid Backlighting
  4. Brust Mode
  5. Night Mode
  6. Timing is everything
  7. Accessories

Setting Up for Success

If you want to take beautiful photos with your GoPro or HERO camera, it’s very important to set up their settings correctly before you start capturing your images. Adjusting your camera settings based on what you want to capture and can make a big difference in the quality of your images.

If you want to click backlit scenes, you can use the HDR format (or WDR if you have an older model). This setting can help you to improve the quality of your photos in tricky lighting, such as during sunrise or at night.

When you are taking pictures in low light, you might notice some graininess in your pictures. To reduce this, use the SuperPhoto mode of GoPro. This mode works with HDR to make your photos clear and sharp, even when the light isn’t great.

If you want to enhance the brightness and exposure of your shots, try using Protune mode. This setting helps maximize the final effect and resolution of your images, making them look even better.

Lastly, if you plan to edit your photos later after the tour you can consider using RAW photo mode. This mode captures images in their raw form, giving you more options and flexibility when you edit them.

Mastering the Wide-Angle Effect

GoPro shots are known for their immersive and exciting captures. The cameras come with a wide-angle lens, also called a fisheye lens, which helps you capture images with great detail. This lens makes viewers feel like they are part of the scene, almost as if they are right there with you.

However, mastering the fisheye effect can be also tricky. Sometimes, you might want to limit the distortion to get the best results. To do this, you can zoom in to reduce the camera’s field of view.

On older GoPro models, you can choose a medium or narrow field of view to crop the image better and lessen the fisheye effect.

Another helpful trick is to use GoPro Studio, a photo-editing app that can remove the fisheye effect from your images. This way, you can keep the fun of the wide-angle view while making your photos look more natural.

It’s also important to choose the right field of view for your shots. If you want to photograph something close to you, in this case, use the wide view. This setting captures more of the scene around your subject.

If you are taking a picture of something that is away and want a flat horizon, switch to the linear view. This setting helps make the horizon look straight and clear.

Avoid Backlighting During Your Session

To get beautiful photos with your GoPro, it’s very important to avoid taking backlit photos during your session. This is especially true for underwater shots, which can often look unclear if the lighting isn’t right.

To make sure your pictures turn out great, wait for the sun to be in the best position or you can choose a different angle for your shot.

If you find yourself in a situation where backlighting is unavoidable, you can use the Wide Dynamic Range (WDR) mode. This setting helps increase the detail in both the light and dark parts of your image.

It’s particularly useful for scenes that have bright areas and darker subjects, allowing you to capture more balanced and clear photos.

Burst Mode: Capturing the Moment

If you want to capture a special moment during fast movement, you can try using the GoPro burst mode it is a fantastic option. This feature allows your camera to take up to thirty photos in just one second!

This means you won’t miss any details, and you can get the perfect shot with great precision. It is just like a video of images. 

You can also adjust how many photos are taken per second based on the speed of the action you’re capturing. For very fast movements, setting the burst mode to capture thirty photos in one or two seconds is ideal. This way, you’ll have plenty of images to choose from to find the perfect moment.

If the movement is slower, you can use it for a more relaxed setting, like five or ten photos in one or two seconds. This helps you capture the action without overwhelming yourself with too many images.

Embrace the Night with Night Mode

When you’re taking pictures at night or creating in low light with your GoPro, you can use night mode for this situation. This setting is designed to help your images stay bright and clear, even in dim lighting.

Night mode keeps the camera’s shutter open long enough to capture as much light as possible, confirming that your photos don’t turn out too dark.

However, there are some important protections to keep in mind to get clear shots in night mode. First and foremost, your GoPro must be fixed and stable.

If the camera moves even slightly when the shutter is open, your photos can become blurred and lose their sharpness. Using a tripod or resting the camera on a stable surface can help you achieve the best results.

Timing is Everything

When you are taking great pictures with your GoPro, selecting the right time of day is important. Many photographers ignore this part, but it can significantly impact the quality of your images.

For instance, the natural colors during sunrise or sunset, often referred to as the golden hour, add a magical charm to your photos. During this time, you can achieve stunning results without needing to edit the images at all.

If you find yourself required to shoot at noon, don’t worry! You can still get good shots by taking a few precautions. Look for shade to soften the harsh sunlight, consider using fill light to brighten your subject, and be open to editing your photos afterward if necessary.

Cloudy weather can also be a blessing for GoPro photography, as it provides great shade and diffused light, which can enhance your images. Additionally, with the right settings, you can capture beautiful shots at night.

Gear Up with Accessories

To enhance the quality of your GoPro photos, consider investing in some essential accessories. While not all are necessary for each shoot, the right tools can make a significant difference depending on your context.

A telescopic pole is great for enlarging your field of vision and capturing sharper images by distancing the camera from your subject. For hands-free shooting, a harness allows you to take dynamic shots while engaging in activities like kayaking or rafting.

A tripod provides stability, enabling you to set your GoPro on various surfaces for steady shots. Additionally, a polarizing filter helps eliminate reflections, making it an excellent choice for photographing water or snow, while enhancing color and contrast.

7 Easy Tips for Taking EPIC GoPro Photos (2024 Photography Guide)

Quick List 

  1. Tip 1 – Framing the Shot
  2. Tip 2 – Originality
  3. Tip 3 – Plan in Advance
  4. Tip 4 – Shoot at Sunrise or Sunset, Never Midday
  5. Tip 5 – Experiment with the Settings
  6. Tip 6 – Gear
  7. Tip 7 – Get Good
  • Tip 1 – Framing the Shot: Make sure to frame your shot. This means placing your subject in a way that looks nice and balanced.
  • Tip 2 – Originality: Try to be unique. Look for interesting angles or views to make your photos stand out from others.
  • Tip 3 – Plan in Advance: Think ahead! Know what you want to capture and set up your GoPro before you start shooting.
  • Tip 4 – Shoot at Sunrise or Sunset, Never Midday: Take photos during sunrise or sunset. The light is soft and pretty, making your pictures look special.
  • Tip 5 – Experiment with the Settings: Don’t be afraid to try different settings. Change things like brightness to see what looks best.
  • Tip 6 – Gear: Use good accessories. They can help you take steadier and better pictures.
  • Tip 7 – Get Good: Keep practicing! The more you shoot, the better you will get. Soon, you’ll be a GoPro pro!

FAQs

How can I improve the quality of my GoPro pictures?

You can increase your image quality by following the tips or using an online tool like Imgfy AI

How to get the best photos with GoPro?

To take the best photos try considering these tips:

  1. Tip 1 – Framing the Shot
  2. Tip 2 – Originality
  3. Tip 3 – Plan in Advance
  4. Tip 4 – Shoot at Sunrise or Sunset, Never Midday
  5. Tip 5 – Experiment with the Settings
  6. Tip 6 – Gear
  7. Tip 7 – Get Good

Does GoPro take high-quality photos?

Yes, but you have to configure it yourself. 

The alternative of GoPro?

The best alternative is Imgify. It allows you to enhance your images with AI technology. AI auto-adjusts your image colors.

The Best Free Latest Photo Editor Apps For Chromebook

We know Chromebook doesn’t support software as Windows or Mac supports but you have choice access to the Play Store which makes it easy to find the best apps even better than those traditional apps.

So Are you tired of finding the best editing apps for your Chromebook?  Congrats, Your search ends here because we came up with the best apps list that can enhance your images easily. Moreover, all software is free to use.

By using these apps you can edit your images easily and every app has its unique features. So let us dive into details.

Overall Best Editing Apps 

Here’s a quick list of these apps:

  • Adobe Photoshop Express
  • Polarr Photo Editor
  • Pixlr
  • GIMP Online
  • Sumopaint
  • Imgify

Adobe Photoshop Express

Adobe PhotoShop Express is the best overall editor you can edit your images and enhance them by sharpening them and much more. As the new full version of Photoshop can’t run on our Chromebook we can run its smart version which is less in size not in features. So it is Adobe Photoshop Express you can find it on the Google Play Store.

You can import RAW photos in it and it is easy to use and user-friendly. It is free and saves your images without destroying the original ones. But there are some issues with it like there are fewer features than Adobe Photoshop CC. it exports images just in JPEG Format and it requires an internet connection to work.

Polar Photo Editor

If you are a person who likes to use filters on their images then it can be the best choice for you. It includes many editing tools but the best feature of it you can share your created filters.

All advanced features like masking or blending are available in it. Its interface is customisable so you can choose every tool position and then set them for ease of use.

For this app, you don’t need to have an internet connection and you have a free editing tutorial in it and you can add cool filters in seconds. But it doesn’t support RAW files and some of the tools like batch editing are accessible in the paid version.

Pixlr

If you have webcam images then it is so valuable for you. It is a web-based editor so you can access it on your Chrome browser. It can recover scratch images and it supports all common formats like JPG, PNG, etc. Its dashboard is available where you can snap webcam images in real time.

It has advanced features like cloning an object, sharpening images deblurring images, and some filters like others have. Overall all features you need are free but if you are a pro user in this case you have to buy a premium version to access all features.

GIMP Online

GIMP (GNU Image Manipulation Program )is the best free editing app. It is an open-source program. It has both a web version and a software version. Its web version works smoothly on your Chrome OS.

It includes basic and advanced tools such as blending and anti-aliasing. Its interface may be hard to understand for beginners and easy to understand for professionals.

You can watch tutorials on GIMP on their website. As we told you it is free and open source so you don’t have to pay or download their app or software. All features which are in the software are available in the web version.  As you access it online so may ads be a problem for you. 

Sumopoint

It is best for layer editing. Its interface feels similar to Photoshop. You have many layer features and dozens of filters. You get presets in this and some brushes too. It is the best comic editing. It is paid and to access you have to buy premium but a free trial is also available. 

Imgify

Imgify is an online AI editing tool. You can edit your blurry images for free. It sharpens your images using AI technology so you don’t have to do anything by yourself. It is a free-to-use web-based editing tool so you can easily access it on your ChromeBook.

However, they offer many features such as old image restoration, mid-journey image enhancement, anime image enhancement, and many more tools. 

Best Free Editing Apps for Chromebook

Here’s a list of editing apps that are also best if upper apps you don’t like you can try them. Here’s a quick list:

Photopea

This is an advanced editing app for Chromebook users. It has both a web-based version and an app version. It supports many formats such as PNG, JPEG, and other formats made by apps like Adobe Photoshop. You can export your images in PSD format and use them in Photoshop. 

You have many advanced tools such as a lasso, healing eyedropper, etc. These features make it a professional photo editing app for Chromebooks. It can be the best alternative to Adobe Photoshop. 

Adobe Lightroom

Adobe Lightroom is an all-in-one photo editing app. You have many features such as a light controls tool, colour grading tools, and other basic tools. But their mask editing makes it best for users.

In contrast, if you have similar images then you have to make a preset and apply it to other images. You can download free presets online. 

You receive free cloud storage. Lightroom manages your images automatically according to date. Their almost basic features are free but some tools are paid you can buy their premium to have access to these tools. 

Canva

It is a graphic designing platform known for its pre-made templates. It includes free photo editing tools where you can adjust your image light, remove background, add text and objects, etc. 

It is the best app for beginners as they can choose the premade template to edit images in seconds. However, the basic features are free but some pro features such as background removal are paid and you need to buy a paid version to access all of these things. Its paid plan is worth $12.99 for a year. 

FAQs

Does Chromebook have a photo editor?

No, but you can access various editing apps via it, such as Google Photos.

What is the best free photo editor for Chrome OS?

Imgify is the best editing tool as it is online and free. 

What is the AI photo editor for Chromebook?

Chromebooks don’t have their own AI editing tool but you can access tools via Chrome and the best one is Imgify’s AI. it is free and can enhance your images easily using their AI technology.

How to Use HitPaw Foto Pea to Enhance Images

After wasting hours on a picture you are not confident to post it on social media. In this case, Hitpaw is one of the best options and in this article, we will explain how to use Hitpaw to enhance your images and other alternatives which can be better. Let’s dive into the details!

How to Use HitPaw Photo Enhancer

Its easy-to-navigate interface makes it easy for users to enhance their pictures. Here’s a guide to enhancing your images:

  1. Download and Install
  2. Upload the Original Photo
  3. Select an AI Model
  4. 7 AI Models for You

Download and Install

HitPaw FotorPea visit their Official website and download it from there. When it comes to your PC for the first time, choose AI Enhance. 

Upload the Original Photo

After successfully installing, and importing images you can do it in two ways, the first one is to drag-and-drop and the second one is to choose directly from software to storage. Moreover, it supports many image formats such as PNG, JPEG, JPG, WEBP, TIFF, etc.

Select AI Model

HitPaw has 7 AI models. You can see them after uploading your image. These 7 AI modes are:

  • Face model This makes your old and blurry images clear
  • General Model, This fits upon landscape, animals, etc images or any real image. 
  • Denoise Model It can be best for low-light images and cartoon images.
  • Colorise Model It is best for black and white images.
  • Colour Calibration It works best on low-situation images. 
  • Scratch Model works best for damaged and old pictures. It makes them smooth. 
  • Low-Light Model Best for pictures that were taken in a low-light environment.

Features 

There are some noticeable features of Hitpaw. Here is a quick list:

  • Eliminate Blur
  • Restore Old Photo
  • Adjust the Low-light Images
  • Enlarge Images
  • Batch Enhance Images
  • Multi-model Processing
  • Customize Your Photo Size

Eliminate Blur

If you have taken a picture and it got blurred and you wish to make it deblur but don’t know how. For this purpose, you don’t need to go anywhere else as Hitpaw offers you this feature. it makes your blurry image clear.

Restore Old Photos

This feature helps you to enhance your old images no matter in which condition they are. Visit their web or app to access this feature. 

Adjust the Low-lights Images

Sometimes at night, I am in a shady place. Our images look dark and low-light and you can relight it with Hitpaw. 

Enlarge Images

If the image size does not look satisfying you must have to enlarge it. You can also do this within this app. 

Batch Image Enhancer

If you have multiple same-looking images and you want to edit them at the same time. Now you can do this with their Batch Image enhancer. To do this repeat after me:

  1. Upload images
  2. Choose AI model
  3. Start Process
  4. Preview Effect
  5. Export Images

Multi-model Processing

To do multi-model processing follow the steps:

  1. Upload the image and Select the First model: First, after uploading select the face model, and after that click on the green icon.
  2. Select Second Model: After the first model check the second model and the image will be processed for both the face and colorize model. It’s an effective method for enhancing old portraits. 
  3. Preview and Export: After applying both models, click preview, and after it export it. 

Customize Your Photo size

If you want your image for a specific ratio, you can do this via this app. However, to do so follow the steps:

  1. After enhancing your image check for customise size ( Under the resolution )
  2. Put the height and width you want.
  3. Export the image

Alternative Of Cat Paw Foto Pea

The best alternative is Imgify. We recommend this because we’ve used it and it has made all adjustments to your images very accurately. As it is an AI tool you don’t need to do anything alone. We offer multiple features some of which are:

  • AI Photo Enhancer
  • AI Old Image Restoration
  • Cartoon maker
  • Face enhancer

And many other tools.

Conclusion

In this article, we have provided you with all the details of Hitpaw’s future including how to use it, features, and alternatives. By following the guide you can enhance your images easily and make them stand out on social media. 

FAQs

What is a HitPaw photo enhancer?

It is a software that can help you to enhance your images easily. 

Is the HitPaw photo enhancer worth it?

Yes, indeed it is but if you are not satisfied with this case we provide you with the alternative Imgify.

Is HitPaw software free?

Yes, it is free of cost.

How do I increase picture quality?

By sharpening your image you can enhance it and increase your picture quality. 

What is the best alternate solution?

Imgify is the best solution that you can use as an alternative to Hitpaw.