-Advertisement-

How to Enhance Text in a Photo: Best Free Tools to Unblur Text

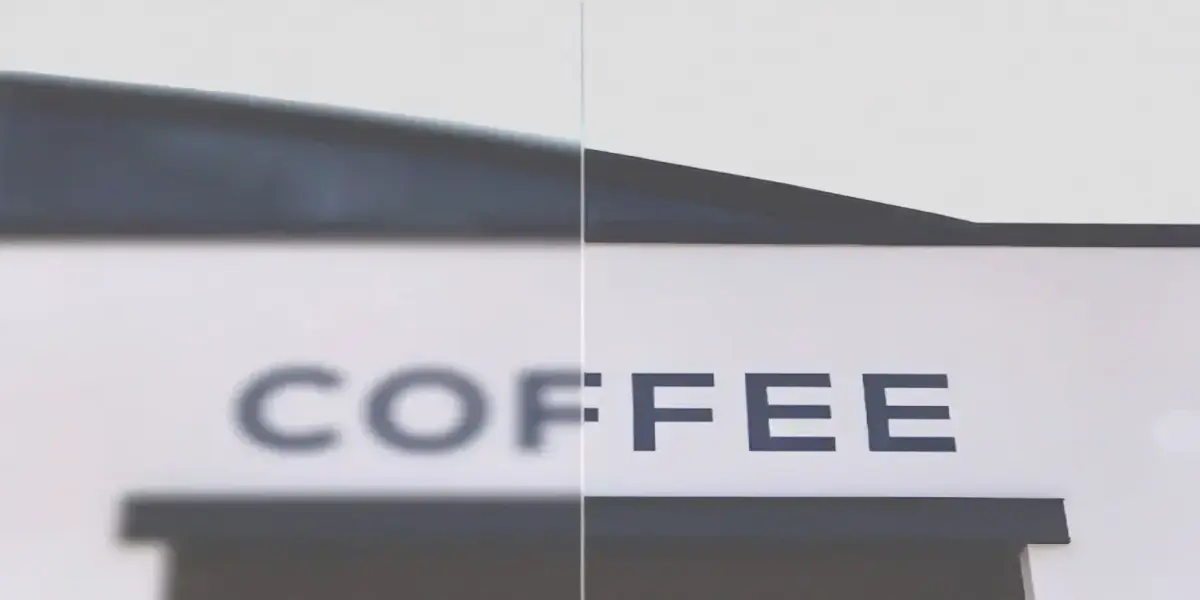
Sometimes, when we click an image text in our pictures looks blurry and hard to read. It may be an image or a scanned document. If you want the clear text.

There are many ways to fix this and some special tools that make the text sharp and readable. Let’s dive into the details. 

Easy Steps to Make Text Clear in Images

Making text clearer in a picture is simple. Just follow these steps:

  1. Upload image
  2. Let the AI Make the Text Clear
  3. Check and Download the image

Step 1: Upload Your Blurry Image

First, upload the image that has blurry text. You can use a tool like Imgify. Just drag and drop your image or select it from your device. 

Step 2: Let the AI Make the Text Clear

After you upload, the AI will work on your image and make the text clear. You can use  Imgify’s AI it is smart and easily can fix the text.

Step 3: Check and Download Your Image

After the process check the preview if it is clear, download it. 

Why Use Imgify to Fix Blurry Text?

Imgify’s AI is a great choice for fixing blurry text in images. Here’s why:

  • One-Click AI Magic
  • Work on All Devices
  • Support almost every format
  • More than just a text enhancer

One-Click AI Magic

With Imgify’s AI, you just need to click once, and the AI does all the procession for you It’s even faster so you can enhance your image text easily. 

Works on All Devices

Whether you’re on a computer, tablet, or phone, Imgify’s AI can work everywhere. You can fix your images anytime, anywhere, and on any device. 

Supports Many Image Types

Imgify’s AI can handle lots of different image types, like JPEG, PNG, and more. So you don’t need to change your image format before enhancing it.

More Than Just Text Fixing

Imgify’s AI can do more than just fix text. It also has other tools to make your images look even better. Such as their AI anime image enhancer makes your favourite anime character look better. 

Best Free AI Tools to Make Text in Images Clear in 2024

If you’re looking to unblur text in images in easy ways without wasting time editing manually. Several free AI tools can help you reach this. These tools are also user-friendly and can be accessed from your browser and mobile device. The best AI tools are the following:

  • Canva
  • Pics art
  • Aiseesoft 
  • Vance AI

Best Text Fixers for Phones

Canva Online Image Sharpener

Canva is a popular tool which was known for its premade templates. But now they have added many functions to it. Now you can enhance your image text using Canva.  This is best for on-the-go editing as it fixes your images in seconds.

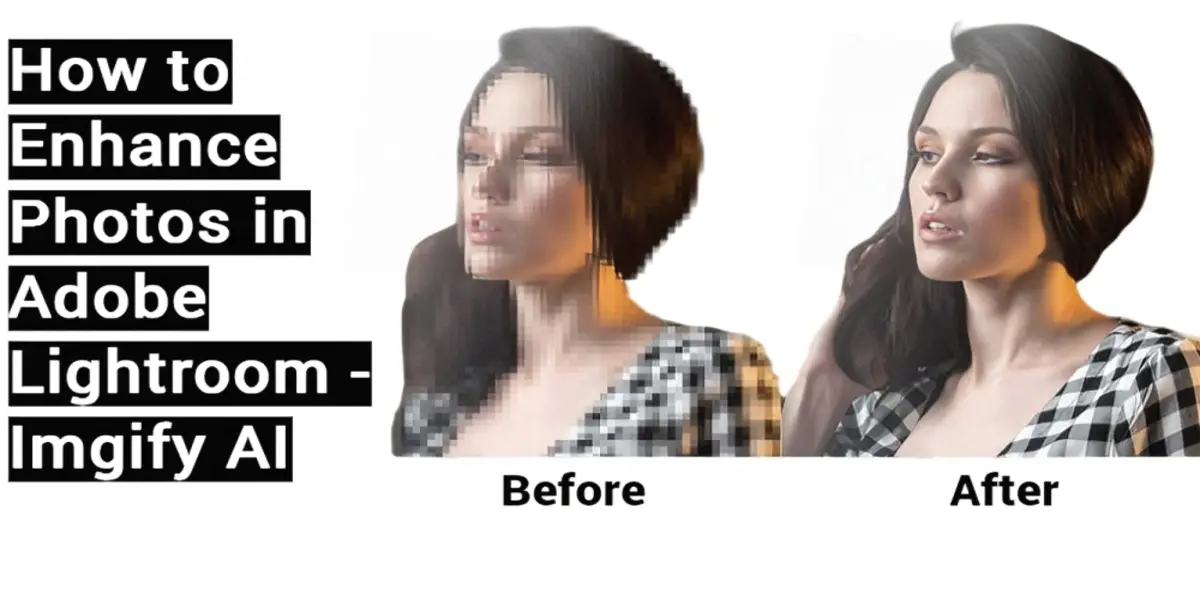
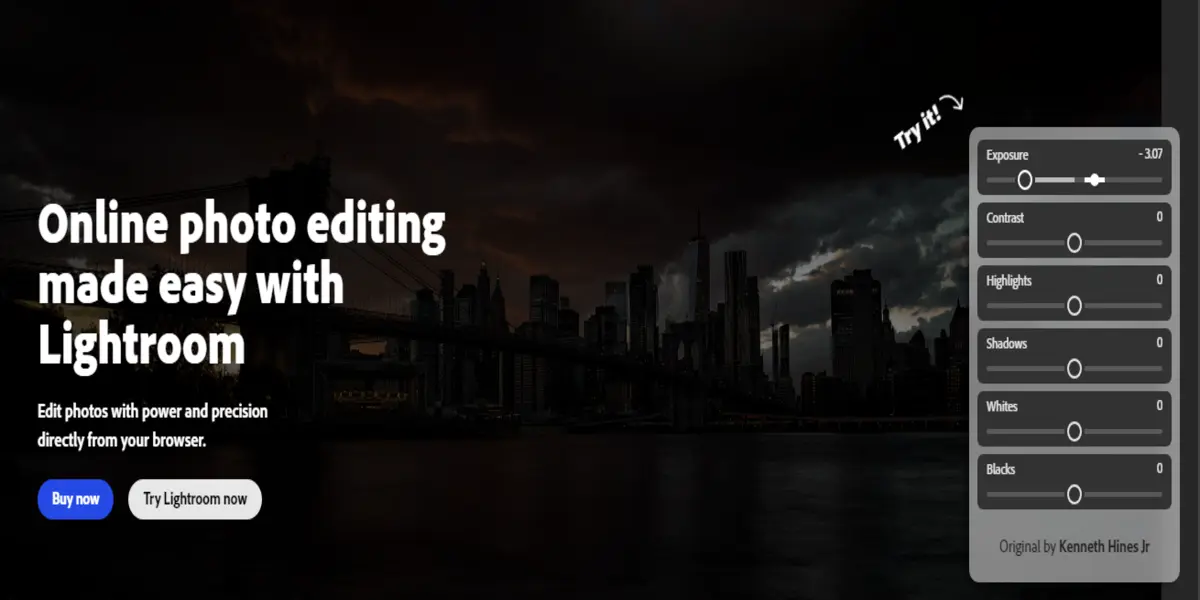
Also Read: How to Enhance Photos in Adobe Lightroom – Imgify

To enhance your image text just upload your image in Canva and use their sharping tool and it will make the image text clear, visible, and easy to read. 

 Canva Features

  • Easy-to-use interface
  • No download is required
  • Additional tools for adding filters, and text. 

Try Canva’s Image Sharpener

Picsart Online AI Image Blur Remover

It is the second-best app for mobile users. It offers you many tools and one of the best tools from it is AI image Blur Remover. These AI tools target your image blur areas and make them clear and sharper. Picsart is good in this firm their AI automatically finds the Blur and makes it visible. 

Features

  • AI blur detection and removal.
  • Available on iOS and Android.
  • Additional editing features like filters, stickers, and text overlays.

Explore PicsArt’s AI Tool

Aiseesoft Image Upscaler Online

This tool is known for its high-quality video and image tools. Their online tool for upscaling your image is quite well and It also uses AI technology to detect blur on your image and make it clear, visible, and easy to read. By enhancing the image they increase its size too. 

Features

  • AI image upscaling.
  • Supports upscaling by 2x, 4x, 6x, and even 8x.
  • Easy drag-and-drop interface

Check out Aiseesoft’s Image Upscaler

Fotor Sharpen Image Online Free

It is also a free online image enhancer which is available for free. This tool also helps you to visible and sharpen the text of your image effectively. Their sharping tool is easy to use. It is best for users who want to edit their images quickly without wasting their time on manual editing. 

Features

  • Quick and easy.
  • No software download is required.
  • Additional features. 

Try Fotor’s Free Sharpening Tool

VanceAI Image Upscaler

They offer several features and one of the best features is an Image enhancer that has a good impact in clearing the text of an image. Their algorithms deeply scan your image and enhance it using their AI technologies. If your image is in low-resolution it can be the best choice for you. 

Features

  • AI-powered upscaling
  • Supports various formats.
  • Enhance image quality by up to 8x.

Visit VanceAI to Learn More

Best Text Fixers for Computers

Adobe Photoshop

Adobe Photoshop is the most commonly used software in computers to enhance images and text. Adobe offers you many tools and ways to enhance your image and the text on it. They offer advanced features like Sharpen Filter and Smar Sharpen and by using them you can achieve professional-level text clarity. 

Features

  • Advanced sharpening tools
  • Layered editing for precise control
  • Supports high-resolution images

Learn How to Sharpen Images in Photoshop

GIMP

GIMP (GNU Image Manipulation Program) is a free upscaling tool. You can use it as an alternative to Adobe Photoshop. GIMP Unsharp Mask is the best for sharpening your image text. You can upscale your images easily by using GIMP. 

Features

  • Free and open-source software
  • Unsharp Mask tool
  • Supports many formats

Explore GIMP’s Features

Conclusion 

Enhancing the text of your images is easy with the help of AI tools and Imgify’s AI is one of the best tools you can use for clearing your image text, sharpening it, or making it clear and well-detailed. Other tools are available as well for the computer to edit your images manually.  

FAQs

How do I make text clearer in a picture?

By using a sharpening tool you can make your image’s text clear and the best tool for it is Imgify. 

How to make text look good on a photo?

If you want to add text to your image and want it to look beautiful try using Bold Fonts. 

How to make text readable in a photo?

To make the image’s text readable try out using various colors which aren’t the same as the image’s color.

How to Enhance Photos in Adobe Lightroom in 2024 – Imgify

How Can I Enhance My Image Quality Using Adobe Lightroom? It’s a question that seems on everyone’s lips—like a common thread weaving through photography. By using Adobe Lightroom, you can breathe new life into your images with just a few simple steps.

In this article, we’ll walk you through the most effective ways to sharpen your images, along with alternative methods. By the end, you’ll be able to enhance your photos as easily as pie.

What Does the Enhance Feature Do?

The word “Enhance” is like adding the cherry on top of your image—sharpening the details, enriching the colours, and improving the texture. Adobe Lightroom allows you to do just that. You can increase your image size and resolution by converting it to a DNG file, but remember, the file must be in RAW format to get the best results.

Example: Imagine you took a picture of a sunset, but the colours look dull. By using the Enhance tool, you can make the oranges and pinks look as bright as they did in real life!

Reasons to Use Lightroom Enhancer

Images that need a little more TLC (tender loving care) are a breeze to enhance. Back in the day, cameras couldn’t capture images in full frames—they were limited to 8×10 or 11×14 prints, making cropping a risky business as it could lead to pixelation.

Also Read: Enhancing Low-Resolution Images to High-Resolution Using GIMP

Today, however, cameras have come a long way, capturing images in stunning 35-40MP. This makes it easier to crop without worrying about quality loss. Even micro cameras can snap photos in the 21MP range. When you do a tight crop, it might lose some of its shine, but Lightroom’s Enhance feature can bring back its sparkle.

Example: You took a picture of your dog, but you want to zoom in on its face. When you do, the picture might get blurry. Lightroom can help you make your dog’s face look sharp and clear again!

How Can We Enhance Images Using Lightroom

There are three different ways to find the Enhance feature in Lightroom:

1. Right-click on your image in the Develop Module, and you’ll see the word “Enhance” in the drop-down menu.

2. Develop Module > Photo tab> click on Enhance.

3. For Mac users, there’s a shortcut: Control-Option-Shift-I

Improving Image Quality Using Lightroom

Follow this step-by-step guide to bring your images up to scratch using Lightroom:

  1. Upload your image into Lightroom.
  2. Go to the Develop tab.
  3. Expand the Basic panel.
  4. In the Tone section, adjust the Exposure according to your image.
  5. Use the Recovery option to improve the image quality further.
  6. In the Detail panel (under the Develop tab or Photo menu), select **Enhance Details**.
  7. Navigate to the Noise Reduction area, adjust Luminance to remove noise from the photo, and modify Detail and Contrast to sharpen the image. If your image is still blurry, consider using the upscale options in the Sharpening section.
  8. Repeat these steps until your image is as clear as crystal. Once satisfied, export the enhanced image to your storage.

Example: Let’s say you took a picture at night, and it’s a bit noisy (grainy). You can use the Noise Reduction tool to make it smooth and clear.

What Happens After Clicking Lightroom Enhance

When you hit the “Enhance” button, a pop-up window will appear, showing you what’s in store for your image. The preview window gives you a closer look at the enhanced areas. To see the original version without enhancement, simply click on the Preview window, and it’ll give you a glimpse of the past.

Creating a Lightroom-Enhanced DNG

When you click on the blue Enhance box, Lightroom gets to work on your newly improved DNG image file. Don’t worry—your RAW image will remain untouched, like a backup plan in case things don’t go as expected.

Key Points to Remember When Using Lightroom Enhance

Here are some pearls of wisdom to keep in mind while enhancing your images:

  • Always start with a RAW format image.
  • The upgraded file will be in DNG format and can be re-edited in Lightroom.
  • Your original RAW file will stay the same.
  • The Enhanced file will be larger but will maintain the quality of the original image.

Other Ways to Improve Your Image With Lightroom

If your image still isn’t picture-perfect, try these methods:

Lens Profile Correction

Fix lens-related issues like distortion and vignetting by enabling Profile Correction in the Lens settings.

Remove Chromatic Aberration

Eliminate those pesky colour fringes at the edges of your images with the Chromatic Aberration removal tool.

Crop

Whether you want to focus on a specific object, prepare an image for a particular format, or simply enhance its quality, Lightroom’s cropping tool has you covered. It’s as easy as pie!

Straighten 

Have a landscape photo that’s a bit off-kilter? Straighten it using the crop tool. Just drag a line from one end of the image to the other, and Lightroom will do the rest.

Upright Tool

Remove distortion in images, particularly those with buildings, using the Upright Tool in the Lens Correction settings.

Example: If you took a picture of a tall building and it looks like it’s leaning, the Upright Tool can make it stand tall and straight.

The Best Alternative to Lightroom

If Lightroom doesn’t quite hit the mark for you, consider giving Imgify a whirl. It’s like having a magic wand for your photos, offering features like AI photo enhancement, old image restoration, and even anime image enhancement.

With an easy-to-use interface and everything handled by AI, Imgify is a top-notch alternative. At least give it a try—you might find it’s just what the doctor ordered.

FAQs

How do you enhance photos in Lightroom?

Open your image in Lightroom, choose Photo > Enhance, select Super Resolution, and click Enhance.

How do you enhance blurry photos in Lightroom?

Adjust the Sharpness of your images, and they’ll start becoming as clear as day.

How do I edit perfectly in Lightroom?

Practice makes perfect. Keep at it, and before long, you’ll be editing like a pro.

How do I increase clarity in Lightroom?

By increasing your image’s sharpness, you can boost its clarity and make it crisp as a morning breeze.

What is the alternative to Lightroom?  

Imgify is the best alternative, offering features that can enhance your photos with the click of a button. All enhancements are done by AI. It smoothly adjusts your image colour and makes it sharper and enhanced.

Enhancing Low-Resolution Images to High-Resolution Using GIMP

Have you ever faced a pixelation issue? Sometimes, our old but rememberable picture becomes pixelated and blurry, which smashes the emotions with it, too. We want to recover it and like the resolution to match the latest cameras. 

For this purpose, we have a guide where you learn how to enhance photo quality in GIMP. It is a great software used to enhance old and blurry images. For those who don’t like to use software, we have an alternative online tool.

How to Use GIMP to Enhance Images Without Losing Quality

GIMP is a free and powerful web-based photo editing software that comes with a huge number of features. Our favorite feature, like photo upscaling, is also available. You can increase your image size in different dimensions, which GIMP offers to you.  It uses different algorithms to fill in the missing information in your image. 

Image Enhancing Feature

To use this feature, ensure that you are using the latest version. To use this feature, follow the instructions:

  • Add the low-resolution picture file to GIMP.
  • Go to the Image menu
  • Choose the Scale Image 
  • Put your desired dimension in the Widht and Hight Fields
  • Under Interpolation, choose Lanczos
  • Click on Scale image to enhance your image

Increase the quality of the Image

After the upper process, you can apply the gentle sharpening effect to add more details to your image. You have several tools under the Enhance section to upscale your image. For instance, you can use the sharpening tool to sharpen. To get a high-quality image, use PNG format and avoid JPEG.

Increase Image Resolution with Resynthesizer Plugin

If you have complex images and aren’t enhancing with these processes then you can try the Resynthesizer plug-in that is available on their official plug-in repository. To upscale your image with Resynthesizer, follow the guide:

  • Open GIMP and load your picture to it
  • Click the Filters menu
  • locate Enhance from its drop-down list
  • then choose Resynthesizer
  • In the Synthesis method
  • Select the Auto-detect or experiment with other options, such as Texture synthesis
  • Adjust the Synthesis scale slider for the desired level of resolution.

These methods examine the image’s surface and ways to recreate it in the upscale area. Adjust the settings like Search Size and Blend Mode for fine-adjusting the result. You can preview the upscaled picture. Behind that, click the Synthesize button to do your operation.

Use these methods for your different images and upscale them easily. 

Best Alternative Of GIMP

Imgify is the best alternative. The reasons are that it is free, it uses AI technology, and it is also available online. You don’t need to download it separately, and it offers you many features and much more. 

Key Features of Imgify

  • Ai enhancer
  • AI old image restoration
  • AI anime image enhancer
  • AI Up scaler

And many more features are waiting for your visit. 

FAQs

How to improve picture quality in GIMP?

There are several techniques to improve image quality with GIMP, but the best one is to use the Resynthesizer plug-in. 

How do I make a blurry picture clear in GIMP?

To make your blurry image clear, you can follow the instructions:

  • Add the low-resolution picture file to GIMP.
  • Go to the Image menu
  • Choose the Scale Image 
  • Put your desired dimension in the Widht and Hight Fields
  • Under Interpolation, choose Lanczos
  • Click on Scale image to enhance your image

How to make an image sharper in GIMP?

To sharpen your image instantly, go to the Sharp tool under Enhance.

Is GIMP high quality?

Yes, they provide you with many free tools to enhance your image and change it from low resolution to high resolution.

How to Fix & Enhance a Pixelated Photo in Photoshop: Latest Guide

Have you ever captured a lovely image that becomes pixelated, and you wish that it become clear magically? It is a common question asked by everyone is it possible to enhance a pixelated image?

Nowadays it is possible due to Photoshop and AI tools.  Offensive resizing or reduction makes your image glance pixelated. To solve this problem, we have developed a guide for enhancing pixelated images with and without Photoshop. 

What is Pixelation

An image is made of pixels or dots. When you increase your image size, the pixels also get blurred and look like dark, blurry squares. These squares increase as the image size increases. Doing this makes your image pixelated. 

Why do Photos Become Pixelated?

  • Poor printing and resizing: This is the most common reason, and it happens when someone prints an image on the wrong page or with the wrong resolution settings.
  • Downloaded images: Whenever you download an image from social media, it becomes pixelated. The reason behind this is the small size of the image.
  • Compression: When you upload an image to social media, blog, or other platforms, its file size (compressed) decreases, and your picture looks pixelated. 
  • Low-resolution images: Low resolution is another cause of pixelated images, which happens due to low camera resolution. 

How to avoid it

The best way to avoid it is to have the original image and if not possible, you can try free online tools to enhance a pixelated image. 

Type of Images that can be Depixelated

Some types of images can be Depixelated easily, and those are the following:

  • Low-resolution photos
  • Old or deteriorated photos
  • E-commerce photos
  • Anime photos

How to De-pixelate with Photoshop

There is a quick list by following it, and you can easily de-pixelate your image:

  1. Adjust the size and upsample.
  2. Sharpen it up.
  3. Add gentle blur.
  4. Make it soft.

Adjust the Size And Upsample

Adobe Photoshop includes powerful AI features that enhance your image automatically. You just have to use Photoshop’s large image feature, and its AI auto-enhances your image. By doing this, you will see a de-pixelated image in the results. 

Sharpen it Up

Adobe Photoshop also allows you to sharpen your image in both camera raw and software. Increase the sharp rate according to your image. 

Add Gentle Blur

After doing those 2 steps, if the results aren’t as you want, try using Gaussian blur to make your image soft and de-pixelated. 

Make it Soft

Use Photoshop’s Soft light Blending tool to make your image soft. User exposure and contrast for in-image changes and light, shadow to mask. 

How to fix a pixelated image without Photoshop

The only way to fix a pixelated image without using Photoshop is to Online AI tools. Such software just softens your image and doesn’t have any impact on the edges. They just make the image a little sharp and smooth.

Also Read: Best Software for RAW Photo Editing: Comprehensive Guide

On the other hand, online tools enhance your images with AI technology, make your black-and-white image quality clear and enhance your pixelated image in depth. 

Online Tools to De-pixelate Your Images

Here is a list of the best tools that use AI technology to enhance your pixelated image:

  1. Imgify
  2. YouCam AI
  3. Cutout pro
  4. Pixeiled 
  5. Picwish
  6. Vance AI

Imgify

Imgify allows you to enhance your images in simple ways. It offers you multiple features which you can’t find on any other AI tool. It enhances your image accurately using its AI technology.

Features Of Imgify 

  • De-pixelate Images
  • Old Image restoration
  • Online image enhancer
  • Black and white image enhancer
  • Anime image enhancer
  • AI Object Remover

And many more tools are waiting for your visit. 

YouCam AI

YouCam Perfect is even an AI tool and APP that is obtainable on Android and iOS. It even enhances your image with a couple of features, some of which are the following:

  • AI Photo Enhancer
  • AI Photo Colorizer
  • AI Lighting
  • AI Object Remover
  • AI Image Expansion
  • AI Image Generation

Cutout Pro

Cutout Pro is a free online image-enhancing and depolarizer tool that comes with a wide range of features. 

  • AI Photo Enhancer &Upscaler
  • Anime Enhancer
  • E-Commerce Auto Design

These features make it comfortable for users to improve their image online with easy steps. 

Pixeiled

Pixeiled is an outstanding image depolarizer. Its easy-to-navigate interface makes it easy to use for users. They also offer many features, from making a blurry image clear to making an image enhanced. Some of its features are the following:

  • Photo Enhancer
  • Image Brightener
  • Color correction tools
  • Various photo filters
  • Designing platforms for editing social media

Picwish

Picwish is a top pick for those who like to enhance their portrait photo. With its easy-to-navigate user interface and stunning AI features it makes your blurry and pixelated portraits clear. Some of Picwish’s key features are the following:

  • AI Portrait Enhancer
  • Unblur Text Image
  • Photo Colorizer
  • Comprehensive Photo Editing Tools

Vance AI

Vance AI is the go-to image enhancer and de-pixelizer. It sharpens your images and makes every edge quilted and beautiful.  No matter if your images are blurry, old, or pixelated, Vance AI makes them clear and sharp with its AI technology. Key features of Vance AI are the following:

  • AI Image Enhancer
  • AI Photo Retoucher
  • AI Photo Colorizer
  • Comprehensive photo editing tools

How to fix a pixelated image on iPhone/ Android

No matter in which format and quality your image is. If it is taken from any iPhone or Android, you can enhance it using the Imgify online Photo Enhancer tool. You just have to follow the steps:

  • Upload image
  • Start the process
  • Download image

Conclusion

If you have a nice computer or laptop that can support Photoshop, then you can use it to enhance your images. If not, don’t worry. You can use the online depolarizer tools, and Imgify’s AI tools are one of the best tools I ever used.

Give it a try, and I’m sure you will love it. The reason behind it is they offer you a wide range of features like photo enhancement, anime image enhancement, old image restoration, and many more features, so just visit it. 

FAQs

Is it Possible to enhance pixelated images online?

Yes, you can enhance your images online using the following tools:

  1. Imgify
  2. YouCam AI
  3. Cutout pro
  4. Pixeiled 
  5. Picwish
  6. Vance AI

How can I make a pixelated picture clear?

You can use Photoshop or online tools to de-pixel your images. 

Can you Un pixelate a pixelated image?

Yes, our Imgify tool enhances your images in easy steps and makes them clear and sharper. 

How do I fix pixelated resolution?

You have two ways to fix it. The first one is to use Photoshop, and the second one is to use online tools.

Best Softwares for RAW Photo Editing: Comprehensive Guide

In today’s world video editing in raw format can be very attractive. When people hear about advanced raw editing features, the first thing that comes to mind is paid software for photo editing but NO!

As professional photo editors, we come with the best and most advanced software for RAW Photo editing and those software are free to use.  In this guide, you will see software for beginners and advanced users.

What is RAW Format?

Raw format is unprocessed data captured by a camera ensuring high quality. Unlike JPEG files which are compressed and processed in camera. On the other hand, RAW photo requires some other software for editing.

Raw Photo editing allows photographers to enhance the photo colour and light of a specific part they want.

Importance of RAW Editing Software

RAW editing software is important because it helps you make your photos look their best. It keeps all the details from your camera, so you can easily fix brightness, Blur, colour, deblur text and sharpness without ruining the picture. This means your photos can be much clearer and more professional-looking.

Top Considerations When Choosing RAW Editing Software

  • User Interface and Ease of Use
  • Editing Features and Capabilities
  • Performance and Speed
  • Compatibility with Camera Models

User Interface and Ease Of Use

The interface of any software matters too much. If it is easy to navigate, then it could be easy for you to understand things and start your editing easily.

Moreover, if the software has some irrelevant features that make it hard to use in that situation, you don’t have to use such software if you are at a beginner level, as it will make it hard for you to edit your image and make it harder too for you to continue your editing journey. 

Editing Features

Different RAW editors offer irregular levels of editing tools. Some software supplies basic features like cropping, exposure adjustment, and colour correction, while others offer advanced stuff such as tone mapping, HDR processing, and support for layers and masks. It’s important to choose software that fits your editing needs.

Also, Read Top 5 Free Web-based Online Photo Editors

whether you’re a beginner looking for simplicity or a professional requiring advanced tools. Consider what specific features you need to enhance your photos and look for software that offers those capabilities.

Performance and Speed

Performance is another key consideration, especially if you’re working with large RAW files or processing numerous images at once. High-performance software can handle large files without slowing down your computer, allowing for faster edits and a smoother workflow.

Check if the software uses multi-core processing or GPU acceleration to speed up tasks. Fast performance means you can spend more time perfecting your edits and less time waiting for the software to catch up.

Compatibility with Camera Models

Not all RAW editing software supports every camera model’s RAW file format. Before selecting a program, make sure it agrees with the RAW files your camera produces.

Some software regularly updates to contain support for new camera models, guaranteeing that you can work with the latest technology. Compatibility is important for preserving the quality of your images and ensuring that all the data caught by your camera is available for editing.

Top Picks for the Best RAW Photo Editing Software

Here’s a quick list:

  1. Adobe Lightroom CC
  2. Adobe Camera Raw (ACR)
  3. Darktable
  4. RawTherapee
  5. Capture One Pro
  6. ON1 Photo RAW
  7. Luminar Neo
  8. DxO PhotoLab
  9. Affinity Photo
  10. GIMP

 Adobe Lightroom CC

Adobe Lightroom CC is a cloud-storage mobile editing app.  The app is free to use. You can download it from the Google Play Store or Apple Store. Some tools, like masking, are paid, but most of the other tools, like manual masking, light setting, colour setting, and more, are free to use. 

They offer you to import presets. Moreover, you can create a preset for your personal use and even copy an image editing setting and paste that setting to another similar image. Professional editing tools like the tonal range are available in the classic version for in-depth editing, but the CC version is made for beginners. 

Besides that, there are also too many tools such as you can switch view mode from grid, compare and details, etc.  As it offers cloud storage, Adobe Lightroom CC arranges your image automatically by time and date. 

Adobe Camera RAW (ACR)

Adobe Camera Raw (ACR) is a handy tool that lets you edit RAW photos easily. It works with popular Adobe programs like Photoshop, making it simple to adjust things such as brightness and colour. Even beginners find it easy to use, while professionals enjoy its powerful features.

With ACR, you can adjust your photos to bring out their best rates. It helps you make changes without losing any detail, so your images stay sharp and clear. This makes ACR a go-to choice for anyone looking to improve their photos quickly and effectively.

Darktable

It can be used as an alternative to Adobe Lightroom. It lets you start editing in simple steps without doing tons of guesswork. With their geo tool, you can set map location in your image and make it visible on Google Maps without having a planner. 

There are simple easy-to-use tools that allow you to customize the light, color, and highlights of your image. It contains some advanced editing features like deep colour enhancement, grain density, and many more. 

You can upload and categorize your images in it. It isn’t the fastest tool when it comes to uploading, but it also offers you neat file management features that cover their speed issue. 

RAWTherapee

RawTherapee is an all-in-one solution for professionals. In the editor tap you will see all the basic tools of editing. This could be difficult for beginners to understand but best for professionals who want to edit every image in advance way. It supports many images format including JPEG and PNG. 

It arranges your images, and if you want to put a file of images, it will show you those images first as a thumbnail. In contrast, it is available for both MAC and Windows and in 32-bit, 64-bit. 

Capture One Pro

This is a professional editing software that comes with high-quality images and numerous editing features. It offers a customized interface and robust editing tools features that make it good for RAW photo editing. 

ON1 Photo RAW

It is a professional and powerful software that allows its users to enhance and retouch their images easily. It includes AI technology that helps you to enhance your mid-journey images accurately with AI. Over 800 camera raw files and JPEG, TIF, PSD, PSB, PNG, and DNG files are supported.  

Luminar Neo

Luminar Neo is a user-friendly photo editing software that uses AI to help users enhance their images. It’s great for beginners because it simplifies complicated edits, like sky replacement and portrait enhancement, with only a few clicks. Even if you’re new to photo editing, Luminar Neo makes it easy to create stunning results.

For professionals, Luminar Neo offers powerful tools to detail and create unique effects. It’s designed to work quickly, so you can edit photos easily without sacrificing quality. Whether you’re a hobbyist or a professional, Luminar Neo helps you take your photography to the next level.

DxO PhotoLab

This software is best for noise reduction and lens correction. This is best for those who are willing for image quality. Advanced tools allow users to create stunning and quality images free of cost. 

Affinity Photo

Affinity Photo is a powerful tool that helps you edit photos without spending a lot of money on purchasing paid software. It has everything you need to fix colours, remove spots, and create outstanding designs. 

You can use Affinity Photo on both Mac and Windows computers. It lets you work with RAW files and offers features like layers and masks, which help you make detailed edits. You buy it once, so there’s no need to pay every month, making it a great choice for anyone who wants strong editing tools at a good price.

GIMP 

GMU (Image Manipulation program) is the most popular image editing tool. It offers all tools from basics to advanced.

If you are a beginner, then I don’t recommend this because it has a challenging feature-packed interface. On the left side, there are some basic tools like select, crop, etc. On the right side, you will founds tools like a brush, access layers, and so on. 

It offers you a customized interface so you can add and remove tools you want. By using the F1 key, you can seek help. There’s a problem: you need a third-party plug-in to import RAW photos. 

FAQs

What is the best editor for RAW photos?

Adobe Lightroom is the best editor for RAW photos.

How can I edit RAW photos for free?

You can edit RAW images for free in GIMP. 

Is RAW easy to edit?

At first, it could be hard but when you become used to it. It becomes easy to edit. 

Which photo editor is 100% free?

GIMP is a 100% free RAW file editing tool. It offers you multiple features.

Top 5 Free Web-based Online Photo Editors

What if you want to edit an image urgently even if you haven’t time to download a separate software? For that person, we come with the top 5 free web-based photo editors that enhance your image in easy steps. In contrast, all of these editors come with an easy-to-navigate interface. So it’s also best for beginners too. 

Quick List Of 5 Best Editors

  1. Imgify
  2. Pixlr
  3. Adobe 
  4. Canva
  5. Fotor

Imgify

It is a web-based editor that allows you to enhance your images online for free. Moreover, it is easy to use. The editing process is simple and advanced. Its AI technology helps you to enhance your photo in seconds. Moreover, other tools and features of Imgify  are the following:

  • AI Photo Enhancer
  • AI Background Remover
  • AI Old Image Restoration
  • AI Portrait Enhancer
  • AI Unwanted Things Remover

And many more are waiting for your visit.  

Photo Enhancer

If your images are low quality and you want to be high quality at this point, you can use Imgify Image Enhancer. It uses AI technology to enhance your images. You can improve your images in simple steps and the following:

  • Upload your image
  • Start Process
  • View and download the image

Background Remover

Imgify’s AI Background Remover helps you to remove your image background so you can use it on your social media platforms that will look professional. Imgify’s AI is copyright-free so you can use images anywhere without any watermark. 

Old Image Restoration

We all have some old memories that are meant for us, but unfortunately, these are black and white. Imgify offers you old image restoration features so you can enhance your old image quality with their AI technology. 

Portrait Enhancer

We like to capture images in portrait mode because, in this mode, the camera focuses on us, but sometimes, for some reason, the image becomes blurry. We want the image too, so for this, you can use Imgify’s AI portrait enhancer. 

Unwanted Items Remover

At the beach or in a social place, when we capture our image, there are some unwanted persons and objects that don’t look beautiful in our image. To remove such things, use Imgify’s AI tool, which will remove your unwanted object naturally. 

Pixlr

Pixlr is a web-based editor that allows you to edit your images on the web but you can download their software and APP too.  This tool also comes with many features some of which are the following:

Also Read: How to Increase JPEG Resolution: Transform Low-Quality Photos into HD

  • Image Generator 
  • Background Remover
  • Object Remover

And some basic tools like crop images.

Adobe

Adobe Editor comes with many features, but its main focus is on social media images. With it, you can create images for your social media. The features of Adobe are the following:

  • Collage image makes
  • Background Remover
  • Animation

And some basic editing tools. 

Canva

Canva is known for its pre-made templates. If you aren’t an experienced person, then you can use Canva, where you can use professional designs, but unfortunately, to use all the designs, you have to buy Canva Premium as in the free version, you receive fewer functions and templates. Moreover, some amazing features of Canva are the following:

  • Templates
  • Editor 
  • Filters

And other basic tools. 

Fotor

Fotor is an AI editor which comes with some beautiful features. Moreover, all of these AI tools are free to use, but they can be difficult for beginners. Noticeable features of Fotor are the Following: 

  • Image Enhancer
  • AI to art
  • Background Remover

And some necessary editing tools.

FAQs

What is the best free photo editing site?

The best free photo editing website is Imgify’s AI as they offer you many features some of which are the following:

  • AI Photo Enhancer
  • AI Background Remover
  • AI Old Image Restoration
  • AI Portrait Enhancer
  • AI Unwanted Things Remover

Which photo editor is 100% free?

Imgify.net is 100% free to use with advanced AI technology. 

What is the best free online JPG editor?

Imgify.net is the best JPEG editor that can enhance your images in easy steps.

What is better than Photoshop?

Imgify’s AI is an alternative to Photoshop as it uses AI technology to enhance your images.

Which website is best for photo editing?

Imgify.net website is best for photo editing. It comes with AI features that help you enhance your images, remove your background, and more.

How to Increase JPEG Resolution: Transform Low-Quality Photos into HD

JPEG is the most used image format like PNG  worldwide, and most mobile phones store images in this form. However, sometimes your JPEG image is important but in low resolution, and you want this normal photo to be HD photo quality.

To achieve this, you need a high-quality image converter that can effectively transform a low-quality image into a sharp, high-definition picture.

In this guide, you will learn how to increase your JPEG resolution using both online tools and professional software.

Quick Solutions to Increase JPEG Resolution

The most efficient way to convert pictures to HD quality is by utilizing free online tools and software that enhance your images quickly. Below is a list of some of the best software and tools that you can use to change your image quality:

  1. Imgify
  2. Adobe Photoshop
  3. Pixlr
  4. Cutout Pro

Imgify

Imgify’s AI is a powerful tool for anyone looking to convert low-quality images to high-quality. This tool allows you to increase JPEG resolution, make blurry images clear, enhance anime images, and much more. Key features include:

  • Convert Low-Res JPEG/JPG Images to High-Resolution
  • Art photo enhancer
  • Text-based image enhancement
  • Old image restoration

With Imgify AI, enhancing your image quality from low to high is a simple process:

1. Upload your image

2. Start Process

3. Download the output

Adobe Photoshop

Adobe Photoshop is an advanced tool, often considered the best high-quality image converter for professionals. Although it may not be ideal for beginners, it offers a wealth of features for those who are familiar with it.

With Photoshop, you can quickly and effectively increase your JPEG quality. The software includes tools for advanced retouching, quick fixes, and the ability to apply effects that can convert a low-quality image into a high-quality photo.

The software is regularly updated with new tools, making it a go-to for anyone looking to make detailed adjustments and improve the quality of images.

Pixlr

Pixlr is a more beginner-friendly tool that allows you to increase JPEG quality with minimal effort. It’s perfect for casual users who want to add filters, edit quickly, and share their images online.

Pixlr also includes simple tools like undo and darken and offers features like collage-making and designed templates for changing image quality.

Cutout Pro

Cutout Pro is an AI-powered tool designed to help you convert low-quality images to high-quality. It can clear up blurry images, enhance anime artwork, and even improve sketch quality. Cutout Pro makes it easy to change your image quality using AI-based algorithms.

FAQs

How can I convert a low-resolution image to high resolution?

To enhance your image quality, use Imgify’s AI image enhancer. It quickly increases your image resolution in just a few steps.

Can I make a JPEG picture less blurry?

Yes, you can make your JPEG less blurry using the Imgify tool.

Do JPEG files lose quality?

JPEG is a lossy image format, which means you lose some quality every time you save an image in this format. However, unless you save the same image multiple times, this loss is usually negligible.

How can I improve my JPG?

By using online image-enhancing tools and software like Imgify AI, you can increase JPG quality and make your images sharper and more detailed.

How to Make a Blurry Picture Clear Step by Step Guide

One of the biggest disappointments that every photographer faces is blurry images; every photographer should learn how to remove blur from images rather than using Photoshop.

Some people take images for fun and want to clear blur from images, but they don’t know how to do it. Android users are asking how to remove blur from images in Android, and iPhone users want the same solution, too, but for iOS. 

Guess what we are providing a step-by-step guide where you learn about how to remove blur, reasons for blurry images, alternative software, and Online tools. This helps you to overcome that problem. 

How to Remove Blur From Images?

Here are some quick methods to remove blur from images:

  • Adjust Focus and Depth Of Field
  • Use Techniques Of Image Stabilization
  • Customize Sharpness And Contrast
  • Use Focus Stacking
  • Increasing shutter speed
  • Capturing images in RAW format

Adjust Focus and Depth Of Field

The reason behind a blurry image is improper focus or a shallow depth of field, and to remove it and make your image deblur, you can use the Imgify AI photo enhancer tool. This tool adjusts the focus on key elements of the picture. Doing so sharpens your image characters and blurs the image background. 

Image Stabilization

Sometimes a moment of the camera or a little shake can make your image blurry. In the modern age, most smartphones have introduced the image stabilization feature, and if your device doesn’t support that feature, you use the Imgify Image Enhancer tool to stabilize your image accurately.

Customize Sharpness and Contrast

The easiest way to deblur your image is to increase its sharpness and contrast. The results of this are significant as it sharpens your image overall and decreases the blur automatically.  To increase the sharpness and contrast of your image easily with artificial intelligence, you can use Imgify AI. 

Use Focus Stacking

In this method, some images taken from different distances are merged to obtain a greater depth of field. It is useful for landscape and macro images. Doing this manually can be difficult, so use software to do this task for you

Increasing shutter speed

Increasing the shutter speed can help cure blurred images caused by a slow shutter speed. The minimum shutter speed should be mutual to double your lens, and the focal length should be reduced to reduce the chances of getting blurry images

Capturing Images in Raw Format

Capturing images in raw format can help you to be safe from blurry images or at least make it easier to repair. A raw format tells the camera to capture all the current frame details and store them ( this captured file will be large). 

Importance Of Proper Technique To Avoid Blurry Images

Here are some important techniques to avoid blur in your images:

  • Using a tripod
  • Employing proper autofocus settings.
  • Mastering manual focus
  • Practicing capturing images at different shutter speeds.

Using a Tripod

A tripod is a must-have for a photographer. In a tripod, your camera set is stable and doesn’t shake, so you can take clear images without any frustrating blur.  A Tripod is best for landscape shots. 

Autofocus Settings

Autofocus is the best option to ignore blur, and in most cameras, it is known by AF-S(single point), AF-C(continuous) AF-A ( auto). In AF-S, photographers usually focus on a single object, and in AF-C, they focus on continuing focus as long as possible. In AF-A, the camera’s focus auto switches between AF-S and AF-S. 

Manual Focus

It is the opposite of autofocus, where all the controls are in the photographer’s hand. He can choose where to focus and where to not. So if you’re a master at manuals, then there is less chance of blurry images. 

Practicing at different shutter speeds

As we described first the shutter speed has a direct relation with blurry images. At the start, matching shutter speed with focal length is a must to reduce blur in your images.  Make sure to change your camera mode to manual before practicing at different shutter speeds.  

Alternative software solutions for fixing blurry photos

Here are some alternative solutions to clear blur from your images easily:

Imgify

Imgify photo enhancer is the best photo enhancer AI that removes blur from your image and makes it clear, sharper, and enhanced from low quality to high quality.  They offer features like anime image enhancer, sketch enhancer, blur remover, and more. 

GIMP

GIMP is an open-source image editing program that is free to use. This also offers many customization options, but the different thing is that it gives you a plug-in, too. You can use it to manipulate and retouch your images. 

Lightroom

Lightroom is available on Windows, Mac, iOS, and Android. It is best for those who want minor changes like exposure, color grading, contrast, etc.  You can do some professional things too. 

Topaz Photo AI

It is a popular AI tool that can enhance your image, increase its sharpness, and do some other things. It’s used with a combination of other software like Photoshop.

Also Read: How to turn off Auto Photo Enhancer on iPhone

This tool and its working style are different from other traditional tools. In 2023, they introduced a face recovery tool that was especially for blurry images. 

This tool is best for those creators who are searching for a tool that can increase their old image quality and image restoration. 

Paint Shop Pro

This editing software is for Microsoft users. It is a complete editing studio with artificial intelligence technology and machine learning technology to enhance your image quality in one click.  It is best for those who are searching for smart editing software. 

Affinity Photo

Affinity Photo is multifunctional editing software, available on macOS, Windows, and iPad. Their features are raw processing, live preview of effects, image stitching, alpha compositing, black point compensation, and optical aberration corrections. 

FAQs

How to Unblur an Image?

To unblur an image, you can do several things, and the easiest one is to use Imgify’s AI tool. This will unblock your image with one click. 

Why are the photos on my iPhone blurry?

The iCloud Photo Library is very big for people to keep on their appliances. Hence, for this cause, the iPhone power downloads the lower performance of a photo; that’s why photographs seem blurry.

How do I fix corrupted photos?

Tools are known for this job that fixes a rusted photo. An amazing offline picture repair tool that should be used. 

Is this photo-enhancement software free to use?

Yes, all the tools and software in the article are free to use.

How to turn off Auto Photo Enhancer on iPhone

In iPhone 12, apple introduced an auto-enhance feature that increases your image resolution. But in some cases, it over-processes and makes your image AI-generated or unrealistic.

So it becomes awkward for all, and they want to get rid of it, and it is possible to just follow the guide.

How to disable auto Photo Enhance on iPhone

There are simple ways to disable photo enhancers on your iPhone:

  1. Disable HDR
  2. Disable View full HDR
  3. Disable HDR video
  4. Shoot photos in Raw mode
  5. Enable Prioritize Faster shooting
  6. Click Pictures in Burst mode
  7. Click Live Photo
  8. Disable Night mode

Disable HDR

Disable HDR

HDR stands for High Dynamic Range. It adjusts your images’ lights and exposure levels, but sometimes it becomes unrealistic. In iPhone 13 and later, they use HDR auto, but in iPhone 12 and earlier, you have to turn off or adjust by yourself. If you have an iPhone 12 or earlier, you can follow the instructions to disable it. 

Follow the steps to disable HDR:

  1. Go to settings
  2. Navigate to “Camera settings”
  3. Disable “HDR Toggle”

Disable View Full HDR

It increases the brightness for some photos suddenly, and if you don’t like it and want to disable it, follow the steps:

  1. Open “settings”
  2. Go to “Photo Settings”
  3. Disable “View full HDR”

Disable “View full HDR

Disable HDR Video

The iPhone 12,13,14,15 series provides the feature of enhancing your video with true life colors. The results might not be satisfying and look over enhanced to disable it follow the steps:

  1. Go to “Settings”
  2. Navigate to “Camera Settings”
  3. Tap to “Record Video” 
  4. Disable the “HDR Video toggle”

Disable HDR Video

Shoot Photos in Raw Mode

Click photos in Raw mode to decrease processing and later enhance the image by yourself. 

Also Read: Best Free Online Photo Enhancer: Clear Blurry Images Online

This feature is available on iPhone Pro versions like iPhone 12 Pro, 14 Pro, etc. They offer you several qualities like 12MP and 48MP.To click pictures in Raw mode follow the steps:

  1. Open “settings”
  2. Go to “camera settings”
  3. Tap on the “Format option”
  4. Enable the “Apple ProRaw Resolution” feature
  5. On the next page, select resolution 48MP.
  6. Next time tap the Raw option to click images in ProRaw.

Shoot Photos in Raw Mode

Note: It can reduce your storage as one image size will be approximately 20+ MBs.

Enable Prioritize Faster shooting

When you enable this, your camera focus captures the exact frame rather than the best frame, so enabling this can be helpful while stopping auto-enhancing to do so; just repeat after me:

  1. Go to “Settings”
  2. Navigate to “Camera” Settings
  3. Enable “Prioritize Faster Shooting”
Enable Prioritize Faster shooting

Burst Mode

In Burst mode, your camera focuses on clicking the exact frame, so it decreases the processing so you can adjust images by yourself.

  1. Open “Settings”
  2. Navigate to “Camera Settings”
  3. Enable “Volume Up Burst Toggle”

Burst Mode

Live Pictures

Live Pictures

Another way to bypass photo enhancing is to click pictures in live mode and to enable it, repeat after me:

  1. Open your iPhone “Camera”
  2. Tap to “Live Photo” icon
  3. Tap the shutter and click an image
  4. Open the “Photo app”
  5. Select the recent click image
  6. Tap at the live photo (you can find it in the Bottom left corner”
  7. Move the slider to change the frame
  8. Tap the “Make key” pop-up
  9. Done now save changes

Disable Night Mode

In the dim light, the iPhone switches to Night mode automatically, and as a result, the pictures are unreal. To off it repeat after me:

  1. Open “Camera”
  2. At the right corner, the “Night mode” icon will appear after some seconds
  3. Tap the Night mode icon to disable it. 

Disable Night Mode

FAQs

What is a Photo Enhancer on an iPhone?

In the iPhone 12, apple introduced the auto enhance features that auto-enhance your image quality, adjust color and light too, and make it quilted, but sometimes it over-processes the image and makes it unreal. 

How Does Photo Enhancer Work on an iPhone?

When you click an image, the iPhone algorithms analyze the picture and adjust the needed things like colors, light, etc.

Is it possible to Off iPhone Auto Enhance?

Yes, it’s possible to disable the iPhone auto enhancement. There are some ways, and by following, you can improve Photo enhancement.

Can I enhance my images online?

Yes, you can use the Imgify photo enhancer to enhance your images accurately. 

How do I turn off Camera correction on my iPhone?

To disable Lens Correction on iPhone, head to Settings > Camera > Disable the Lens Correction toggle.

Top 5 Free Online AI Photo Enhancer in 2024

Everyone can’t afford a laptop or a computer, so for those, we brought some online tools to enhance their images for free. All tools are tested so just visit and make your image enhanced for low to high quality. Moreover, you can remove blur from your images

Quick List Of Best Image Enhancing Tools Online

  1. Imgify
  2. Fotor
  3. Adobe
  4. Picwish
  5. Cutout pro

Imgify

Imgify image enhancer

Imgify offers you multiple features like image enhancement, blur removal, old image restoration, 4k image quality, and many more features. You can enhance your images in Imgify without signing. In contrast, it offers you other tools, too, like background remover and more. 

Key Features Of Imgify

  • Photo Enhance
  • Blur remove
  • 4k image quality
  • Old images restoration
  • Anime enhance photo

Fotor

fotor image enhancer

It enhances your image online in the simple steps of uploading and downloading. In contrast, It enhances your image quality using AI technology and it increases your image resolution without losing quality.

Also Read: Top 6 Free Photo Editing Apps For Android & IOS

It can instantly remove blur from your image and make it clear and enhanced. You can use these photos anywhere as it does have a watermark on your image. 

Key Features Of Fotor

  • AI Image Enlargement
  • AI Sharpness Enhancement
  • AI Noise Reduction
  • AI Color Correction
  • AI Portrait Enhancement
  • AI Photo Restoration

Adobe

Adobe image enhancer

Its AI features make your images clear in seconds. It adjusts your image lights, alignments, and other necessary things. It applies an enhancement filter to your image, too, to make it stand out. It fixes dark places on your image and adds some texture to clear its quality. 

Key Features Of Adobe

  • Image enhancement in easy ways
  • Adjust light 
  • Animation filter
  • Enhancement filters

Picwish

Picwish image enhancer

It enhances your images with its AI. Their AI makes your images clear and high quality. AI enhances the image without losing quality. It is best for anime creators as its anime-enhancing features enhance your 480p images to a super high-quality image. It enhances your images online too. 

Key Features Of Picwish

  • Pro level Photo enhancer
  • Enhance images without losing quality
  • Anime pic enhancer
  • Potrate pic enhancer. 

Cutout Pro

Cutout Pro image enhancer

This is a multifunctional enhancer that makes your image clear and quilted. It makes your image enlarge and sharper. If your image is noisy it will clear it too. The unique features of it are night image enhancer and old image enhancer; these things make it stand out over others. 

Key Features of Cutout Pro

  • Enlargement
  • Sharpener
  • Denoiser
  • Portrait enhancer
  • Night scene enhancer
  • Old images restoration

FAQs

How does this tool enhance your photos?

Tools enhance images by adjusting image lights, colours, and sharpness.

Why do people use Image quality enhancers?

They use it to enhance their bully images. 

Can I improve picture quality online?

Yes, you can, just search for an AI image enhancer online or check from our list and enhance your images online. 

What is the best free AI image enhancer online?

Imagify’s AI Photo Enhancer is the best image enhancer that makes your image quality up to 8k. This enhancer adjusts your image’s colours, lights, shadows, and more.

Top 6 Free Photo Editing Apps For Android & IOS

In today’s world, quality images are necessary no matter who you are or what you are doing. Everyone who is a photographer or a social media creator wants to make their blurry photos clear, but this isn’t possible with just your mobile camera. But guess what we have a list of the best photo editing apps which are free. 

Quick List of Best Photo Editing Apps Free 

  1. Lightroom
  2. Snapseed
  3. VSCO
  4. Pixlr
  5. PicsArt 
  6. Remini

Lightroom

Lightroom

Adobe Photoshop Lightroom is the best free photo-enhancing app for editing your images from every side. In Lightroom, you can customize your picture’s lights, color, and quality. You can even change the color of your sky. Moreover, you can do line greetings too in it.

Lightroom has thousands of filters that make your image outstanding. Moreover, if you have similar pictures and want to apply the same settings on all, this feature is provided by Lightroom, where you can make a preset of an image and use those settings on any image. It also has cloud storage too. 

Snapseed

Snapseed

It is a free-to-use editing app. It comes with all the necessary tools and some decent filters. U Point is a powerful feature that allows you to customize your image lights. It also has an option to apply the previous settings to the new image, but it does not allow you to create presets. 

It is the best photo editing app for professionals, as it lets you customize your images from each side. You can make images as you want. There are many tools in it and some of them are selective edit brush, lens blur, and more. 

VSCO

VSCO

In the middle of 2010, Instagram started getting reach just for filters. Filters are those things that can edit your images with one click and fast. Here’s VSCO. It offers you a variety of filters that can be used for free.

Also Read: The Best Latest Photo Enhancing Softwares For PC and Mac

It started making Lightroom presets too. Moreover, they are set in order. E.g., the eight color-grade presets are named CG1 through CG8. Every filter is designed for a particular location that may not be suited to your image, but you can save that preset for later use. 

PIXLR

PIXLR

Best for beginners and casual people who want to make little changes to their images. Just add some filters on your image and then post it anywhere you want. It has some easy tools like undo or darken. You can create collage pictures; there are also designed templates you can use to make your images for free.

Picsart

Picsart

Picsart is an easy-to-use app that helps you to enhance your images easily in simple steps. Picsart gives you a variety of features some of them are basic and some are advanced. It offers you filters too. Moreover, you can enhance your image with their AI tool. 

Moreover, in the Sticker section where you can add images to your images. Picsart provides you with free templates. You can create and publish your templates too. 

Rimini

Rimini

It is the best AI app that can recognize faces automatically and enhance your images automatically with its AI technology. It also lets you change your light, colors, and more. Moreover, it allows you to use simple editing tools like cropping and rotating.  Face and background enhancers are both best. 

FAQs

What makes the best photo editing app for iPhone or Android?

  • Have powerful editing features
  • Be easy to use
  • Provide repeatable results
  • Be properly priced with no ads and the tiniest riding to boost

What is the best photo quality enhancer app?

  1. Lightroom
  2. Snapseed
  3. VSCO
  4. Pixlr
  5. PicsArt 
  6. Remini

What is the best free photo enhancer? 

Imgify photo enhancer is best, moreover, if you want to do it on PC you can check Best Photo Enhancing Software for pc and Mac.

Is there a free AI Photo Enhancer

Youcam Perfect and Rimini are the best AI photo enhancers.

-Advertisement-